Welcome to WordPress. This is your first post. Edit or delete it, then start writing!
One of the first things we should do when we start painting with watercolors is to get familiar with our art supplies. We have to know the tools we are going to use to start creating, how they work, their quality, durability, etc. In the case of watercolors, it is very important to get to know the colors, the brushes and the paper that we will be using. I always recommend starting our watercolor art journey with good quality supplies, especially the paper.
Watercolor pigments, depending on the brand, have different collections for professional a.ka. artist and student grade watercolors. I personally prefer professional grade watercolors. However, I often use the student grade from Winsor and Newton Cotman. There are differences between colors with the same name across different brands. Each manufacture’s formula depends on the quantity and quality of their pigments, the type of binder they use (usually it is gum arabic), and other additives to help preserve the paint. I will show you how I do my watercolor swatches to become more familiar with my paints and to use them as a reference when painting.
Let’s start with our swatches:
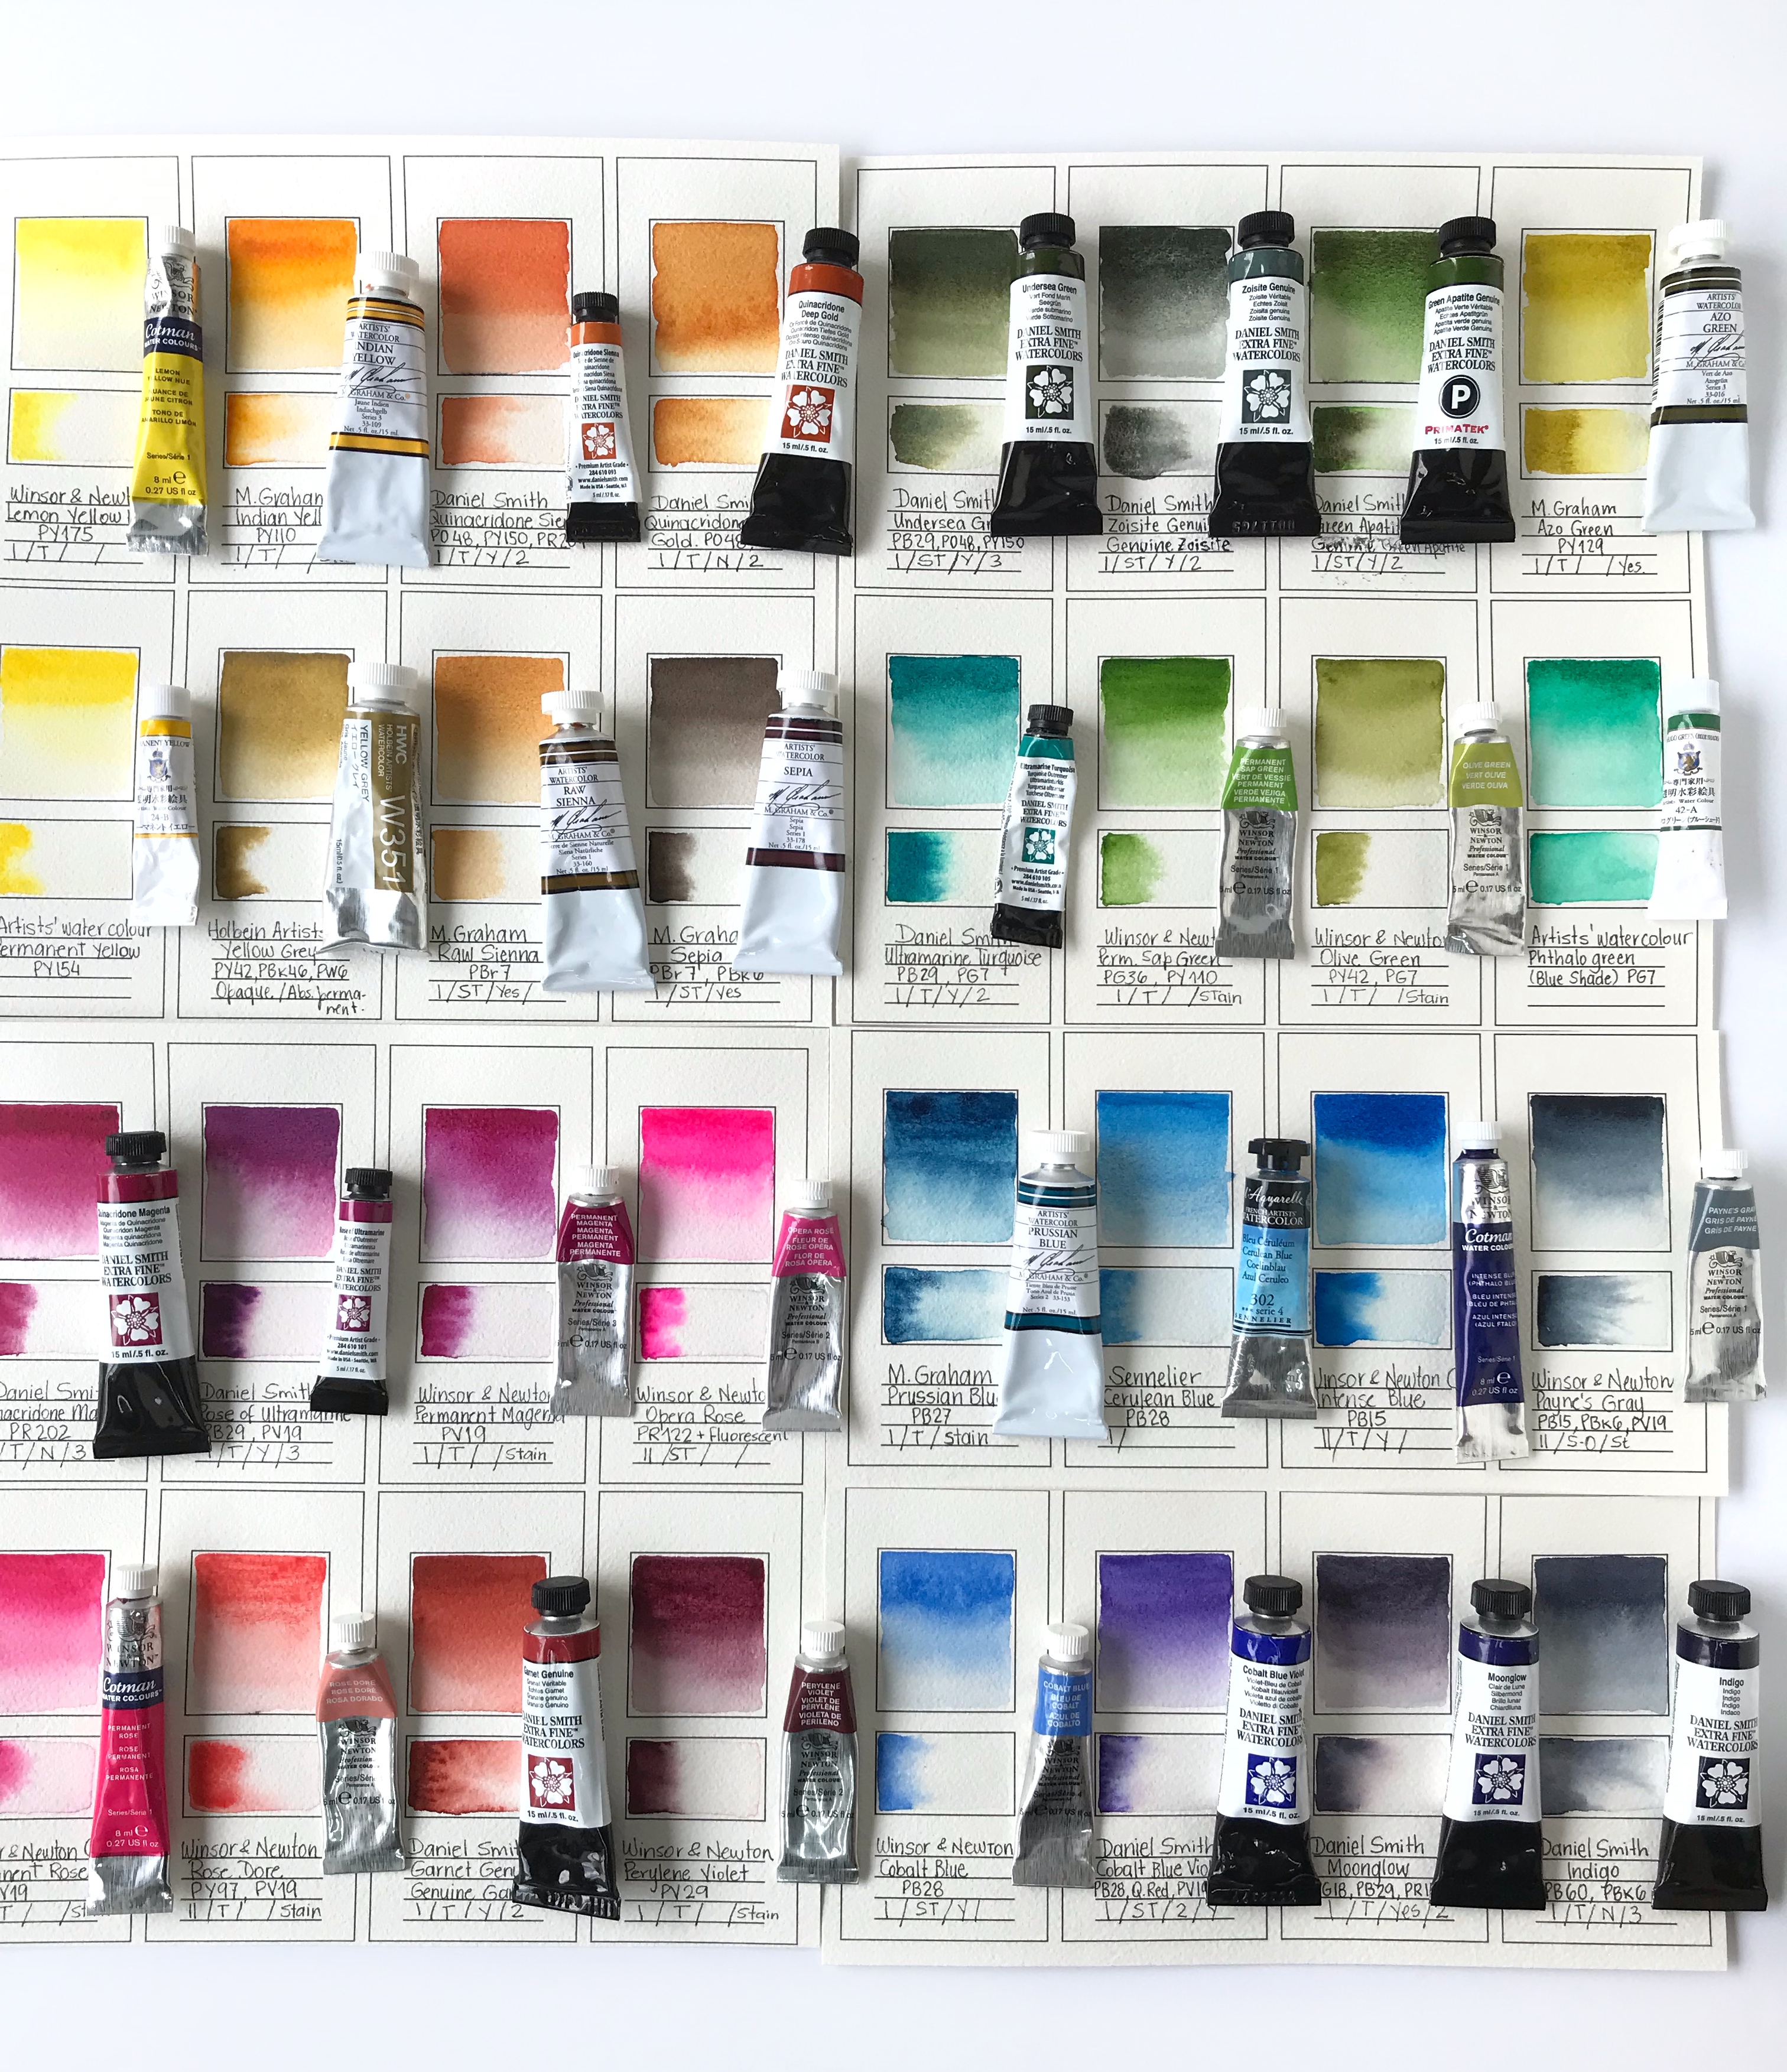
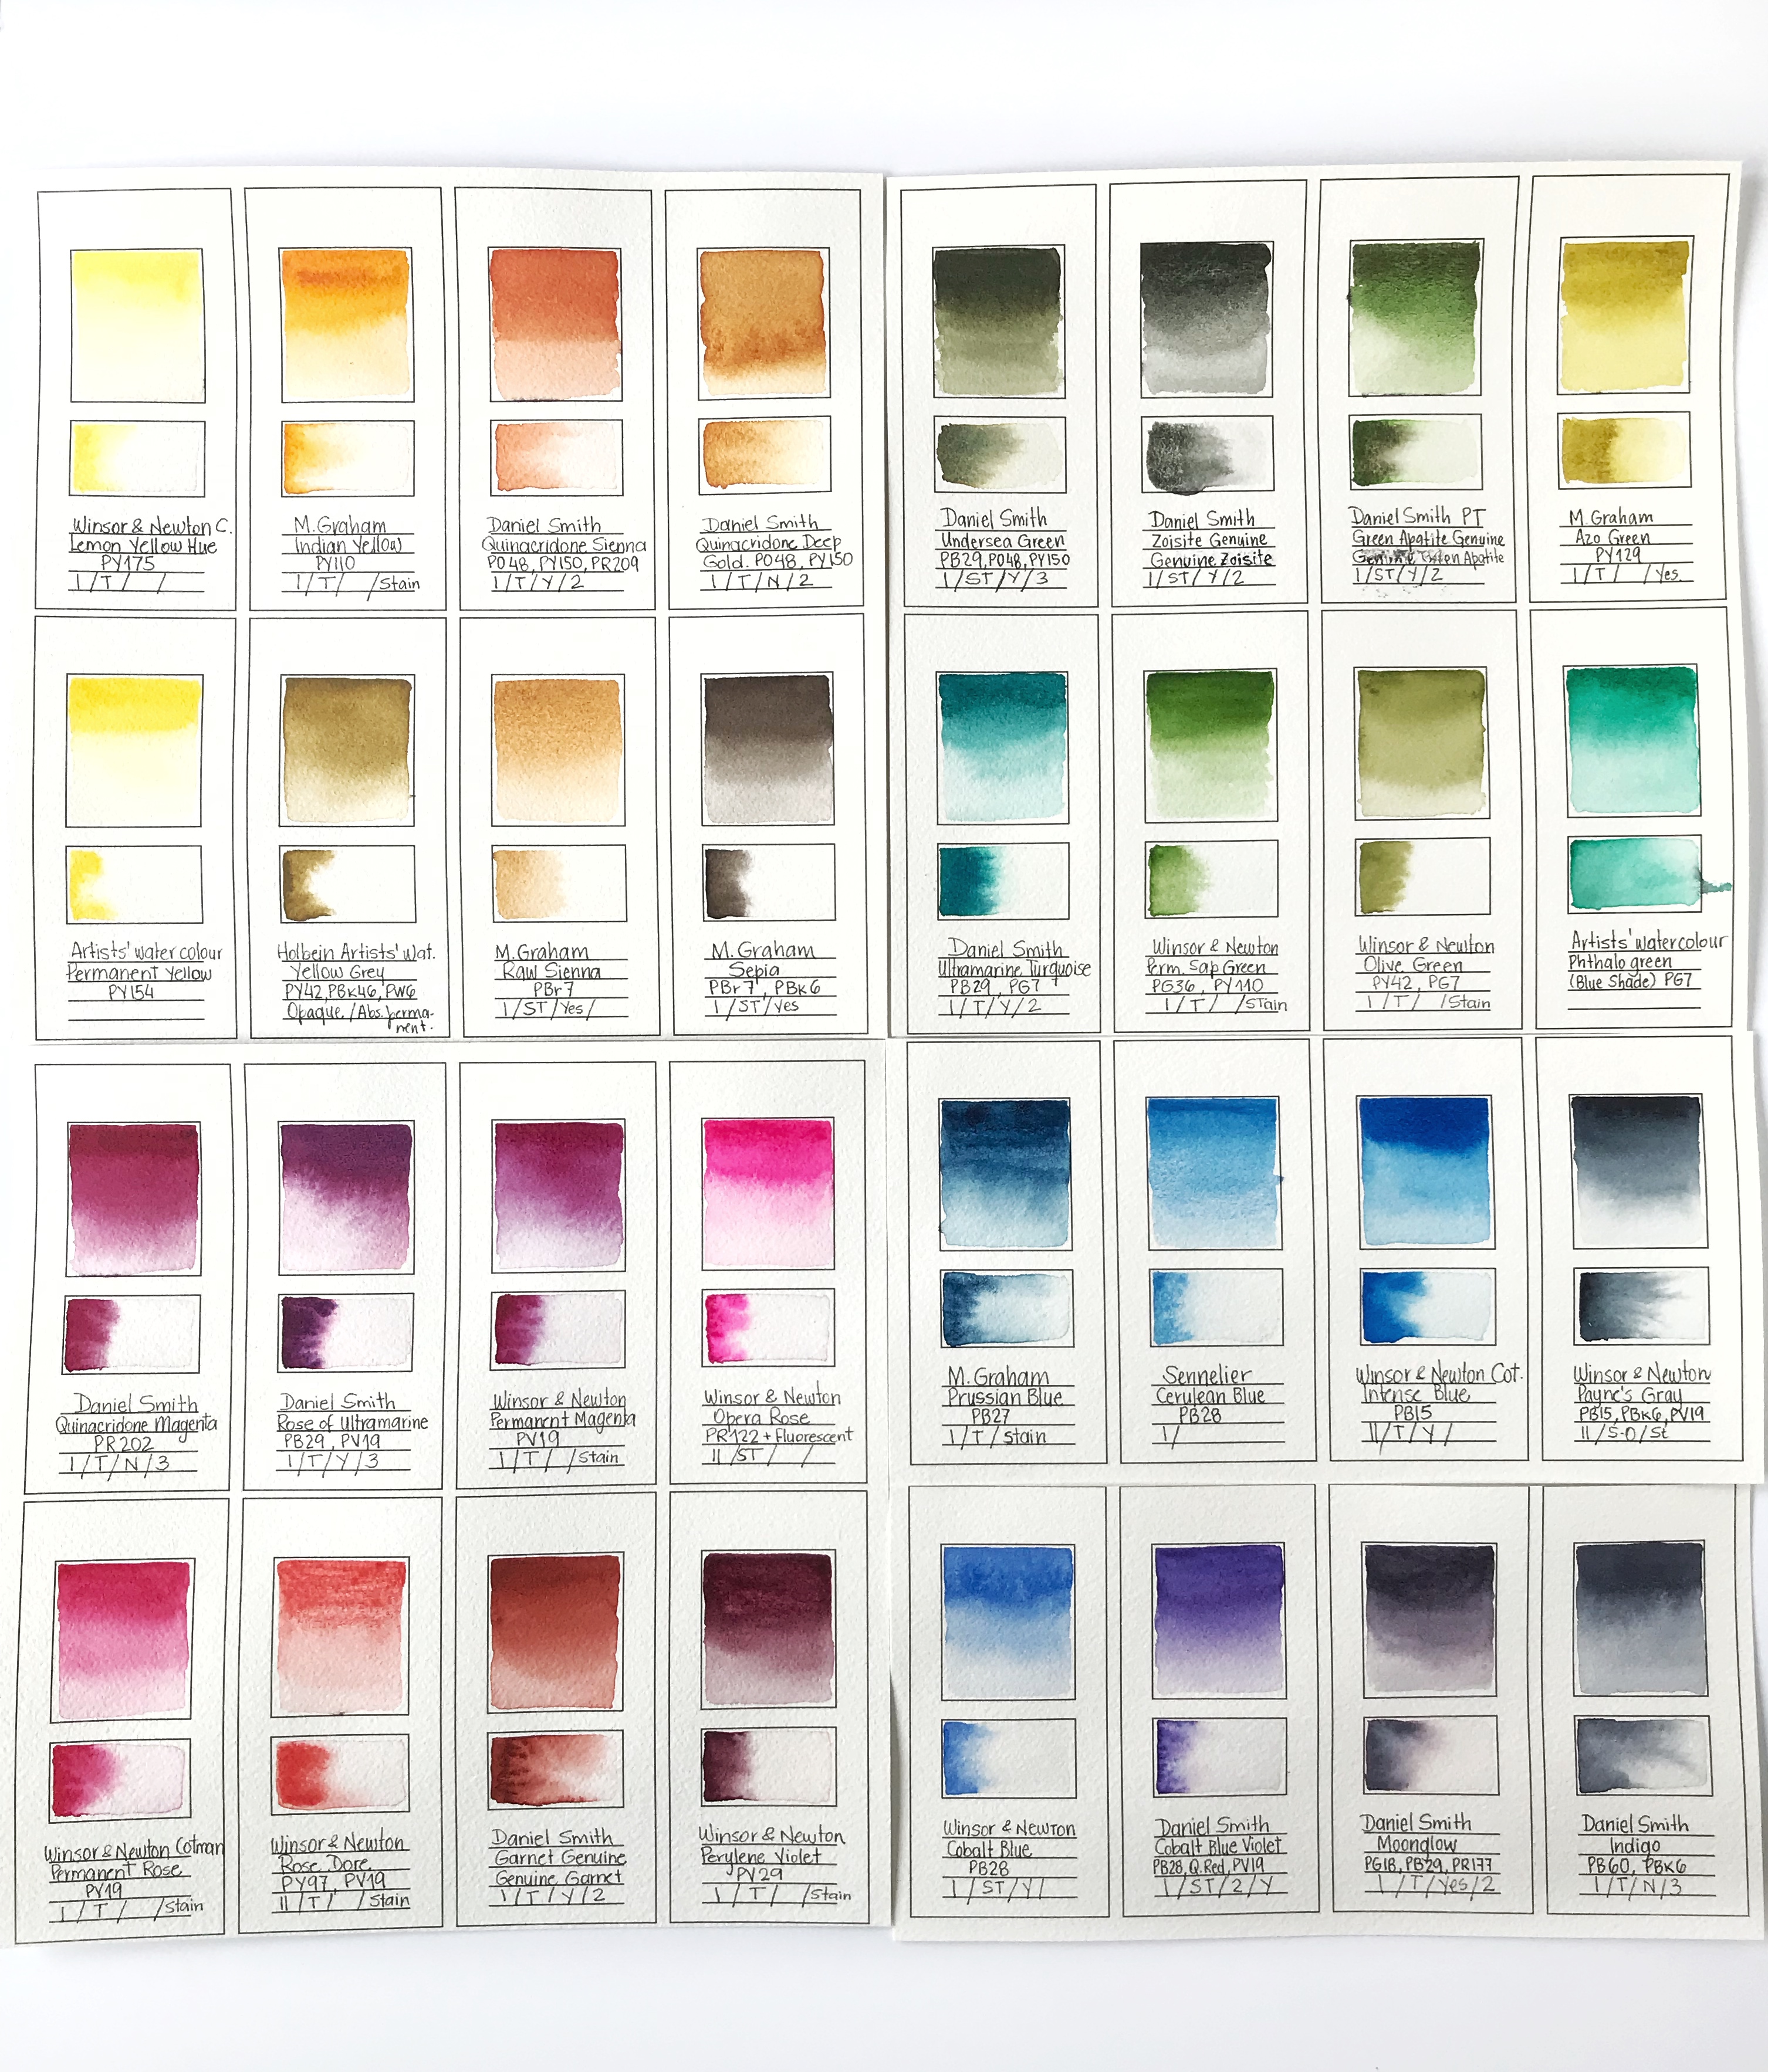
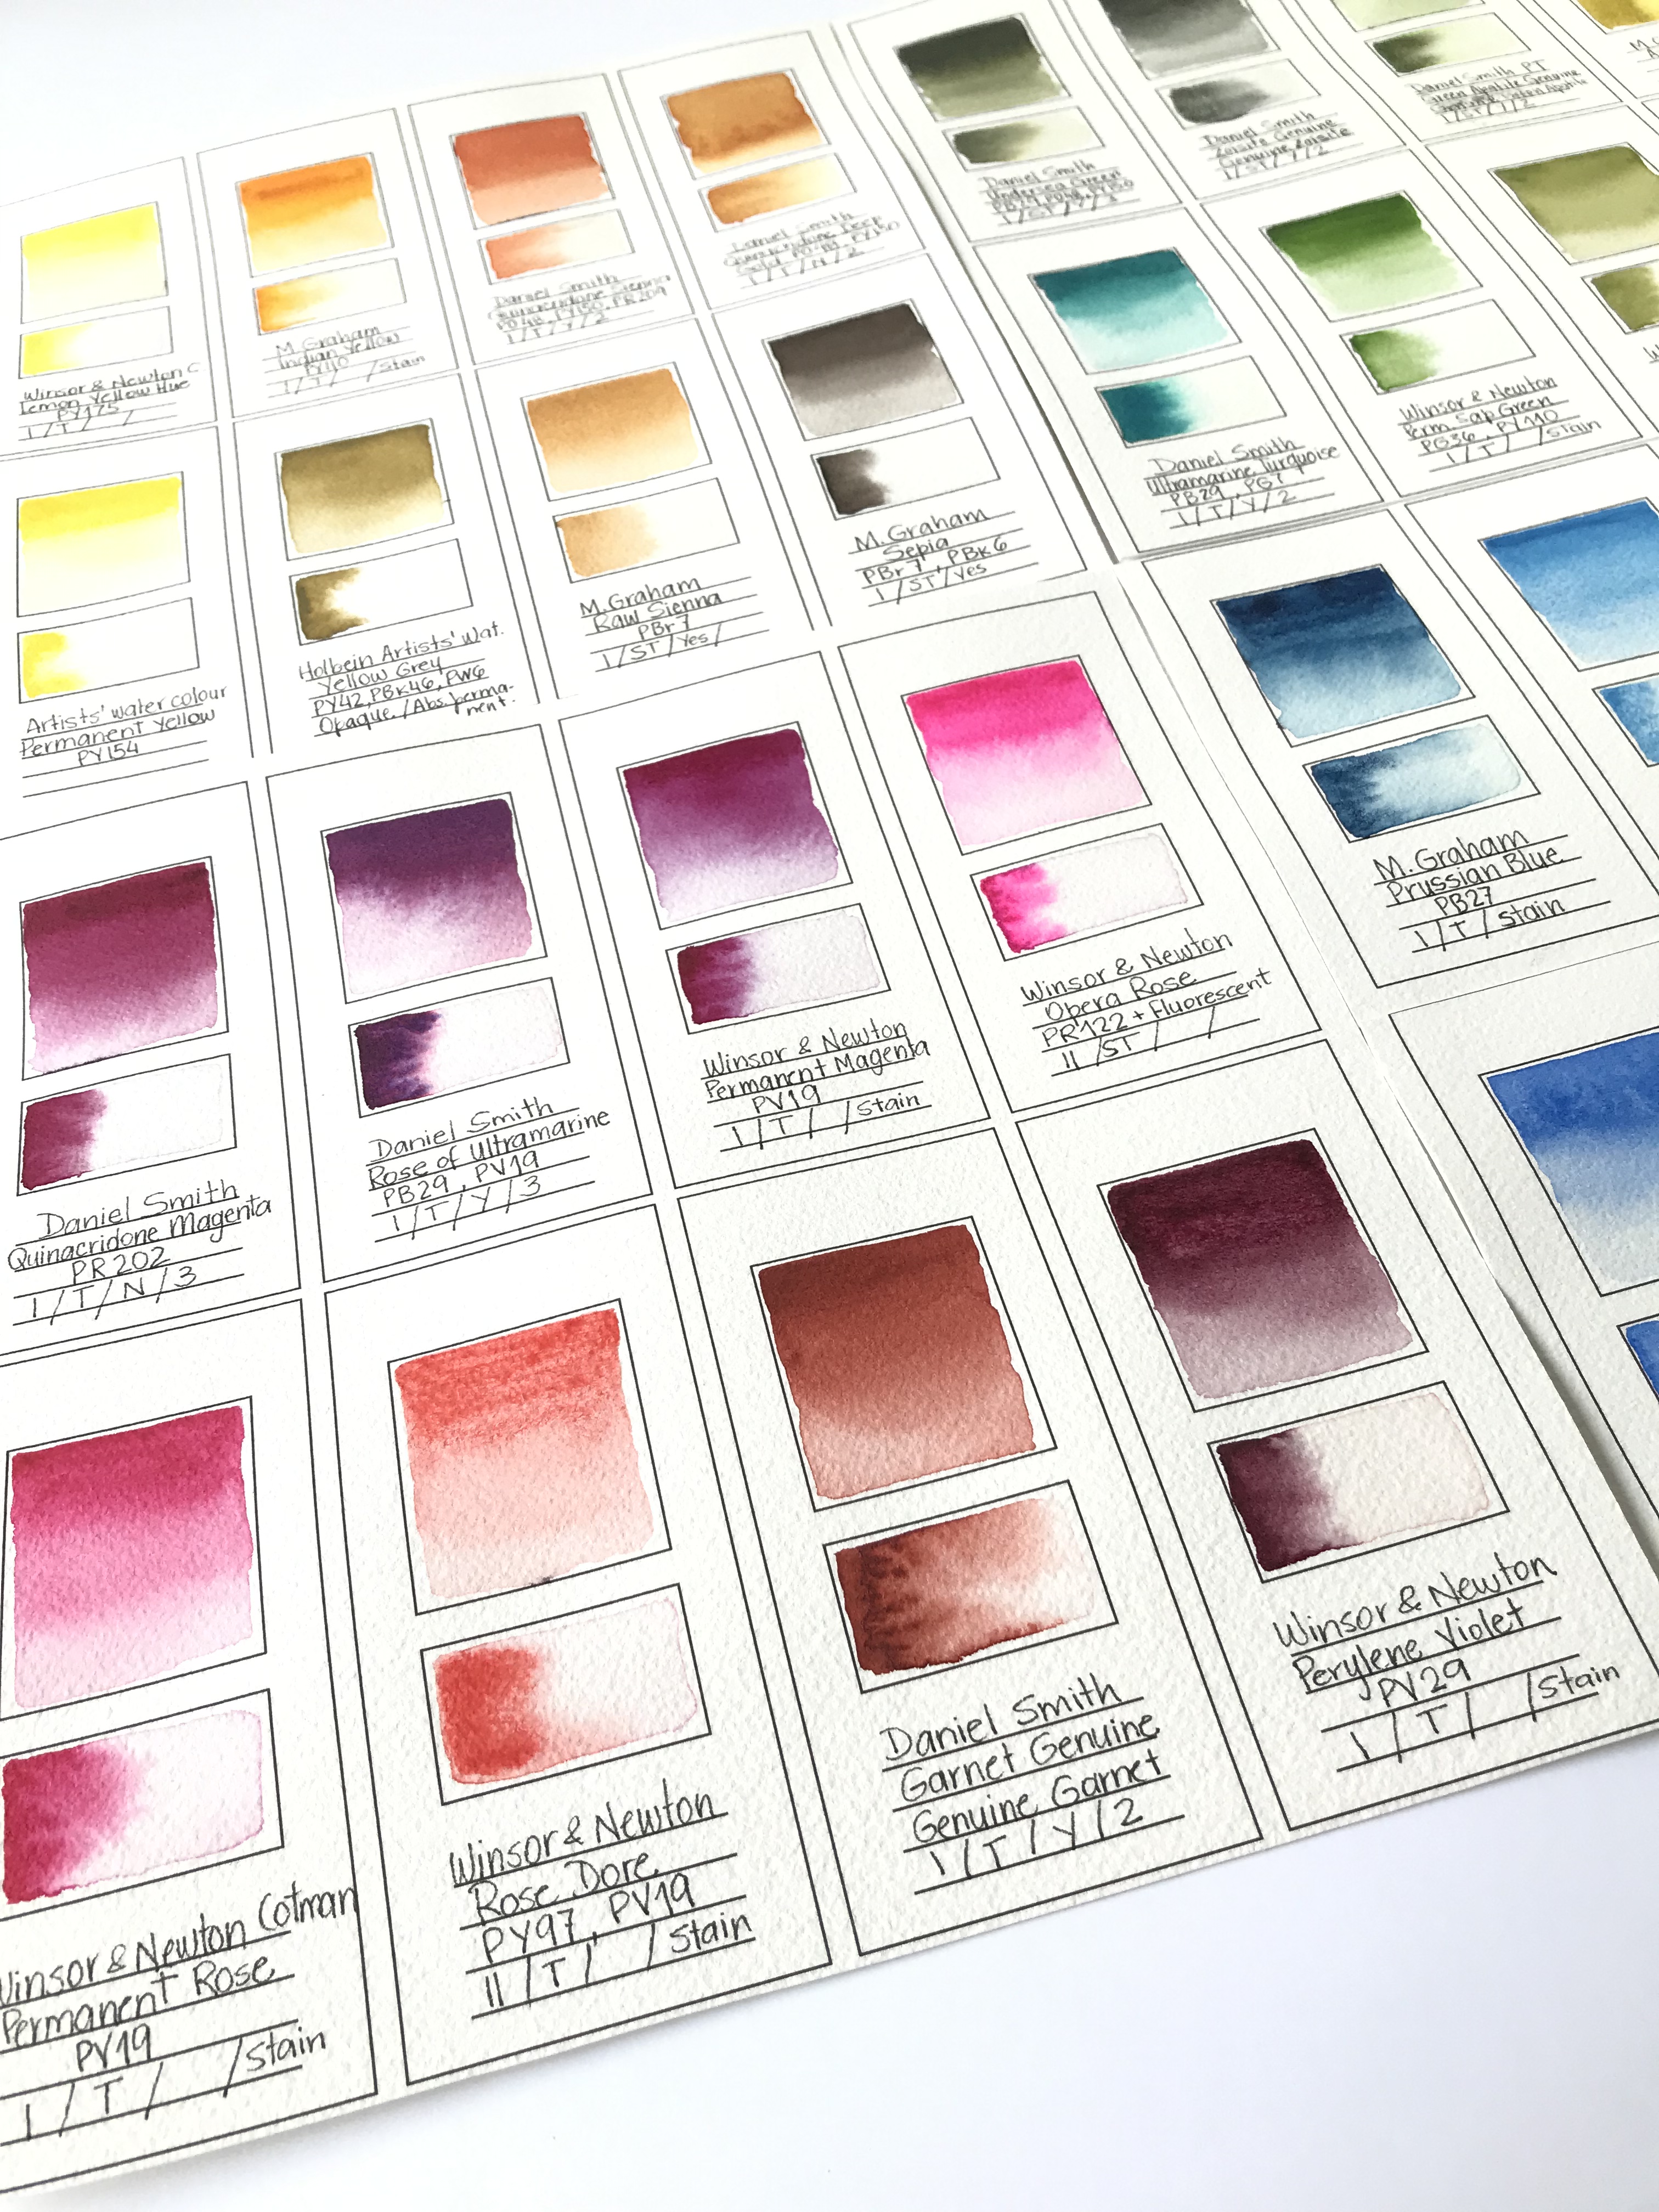
- The first step is to divide all of my colors, all blues, greens, etc. no matter what the brands are. This will help you compare different tones of colors on one paper. A lot of people keep all of the color swatches separate and divide them by brand. I think it is better to have them all together by color on one piece of paper for quick and easy reference later.
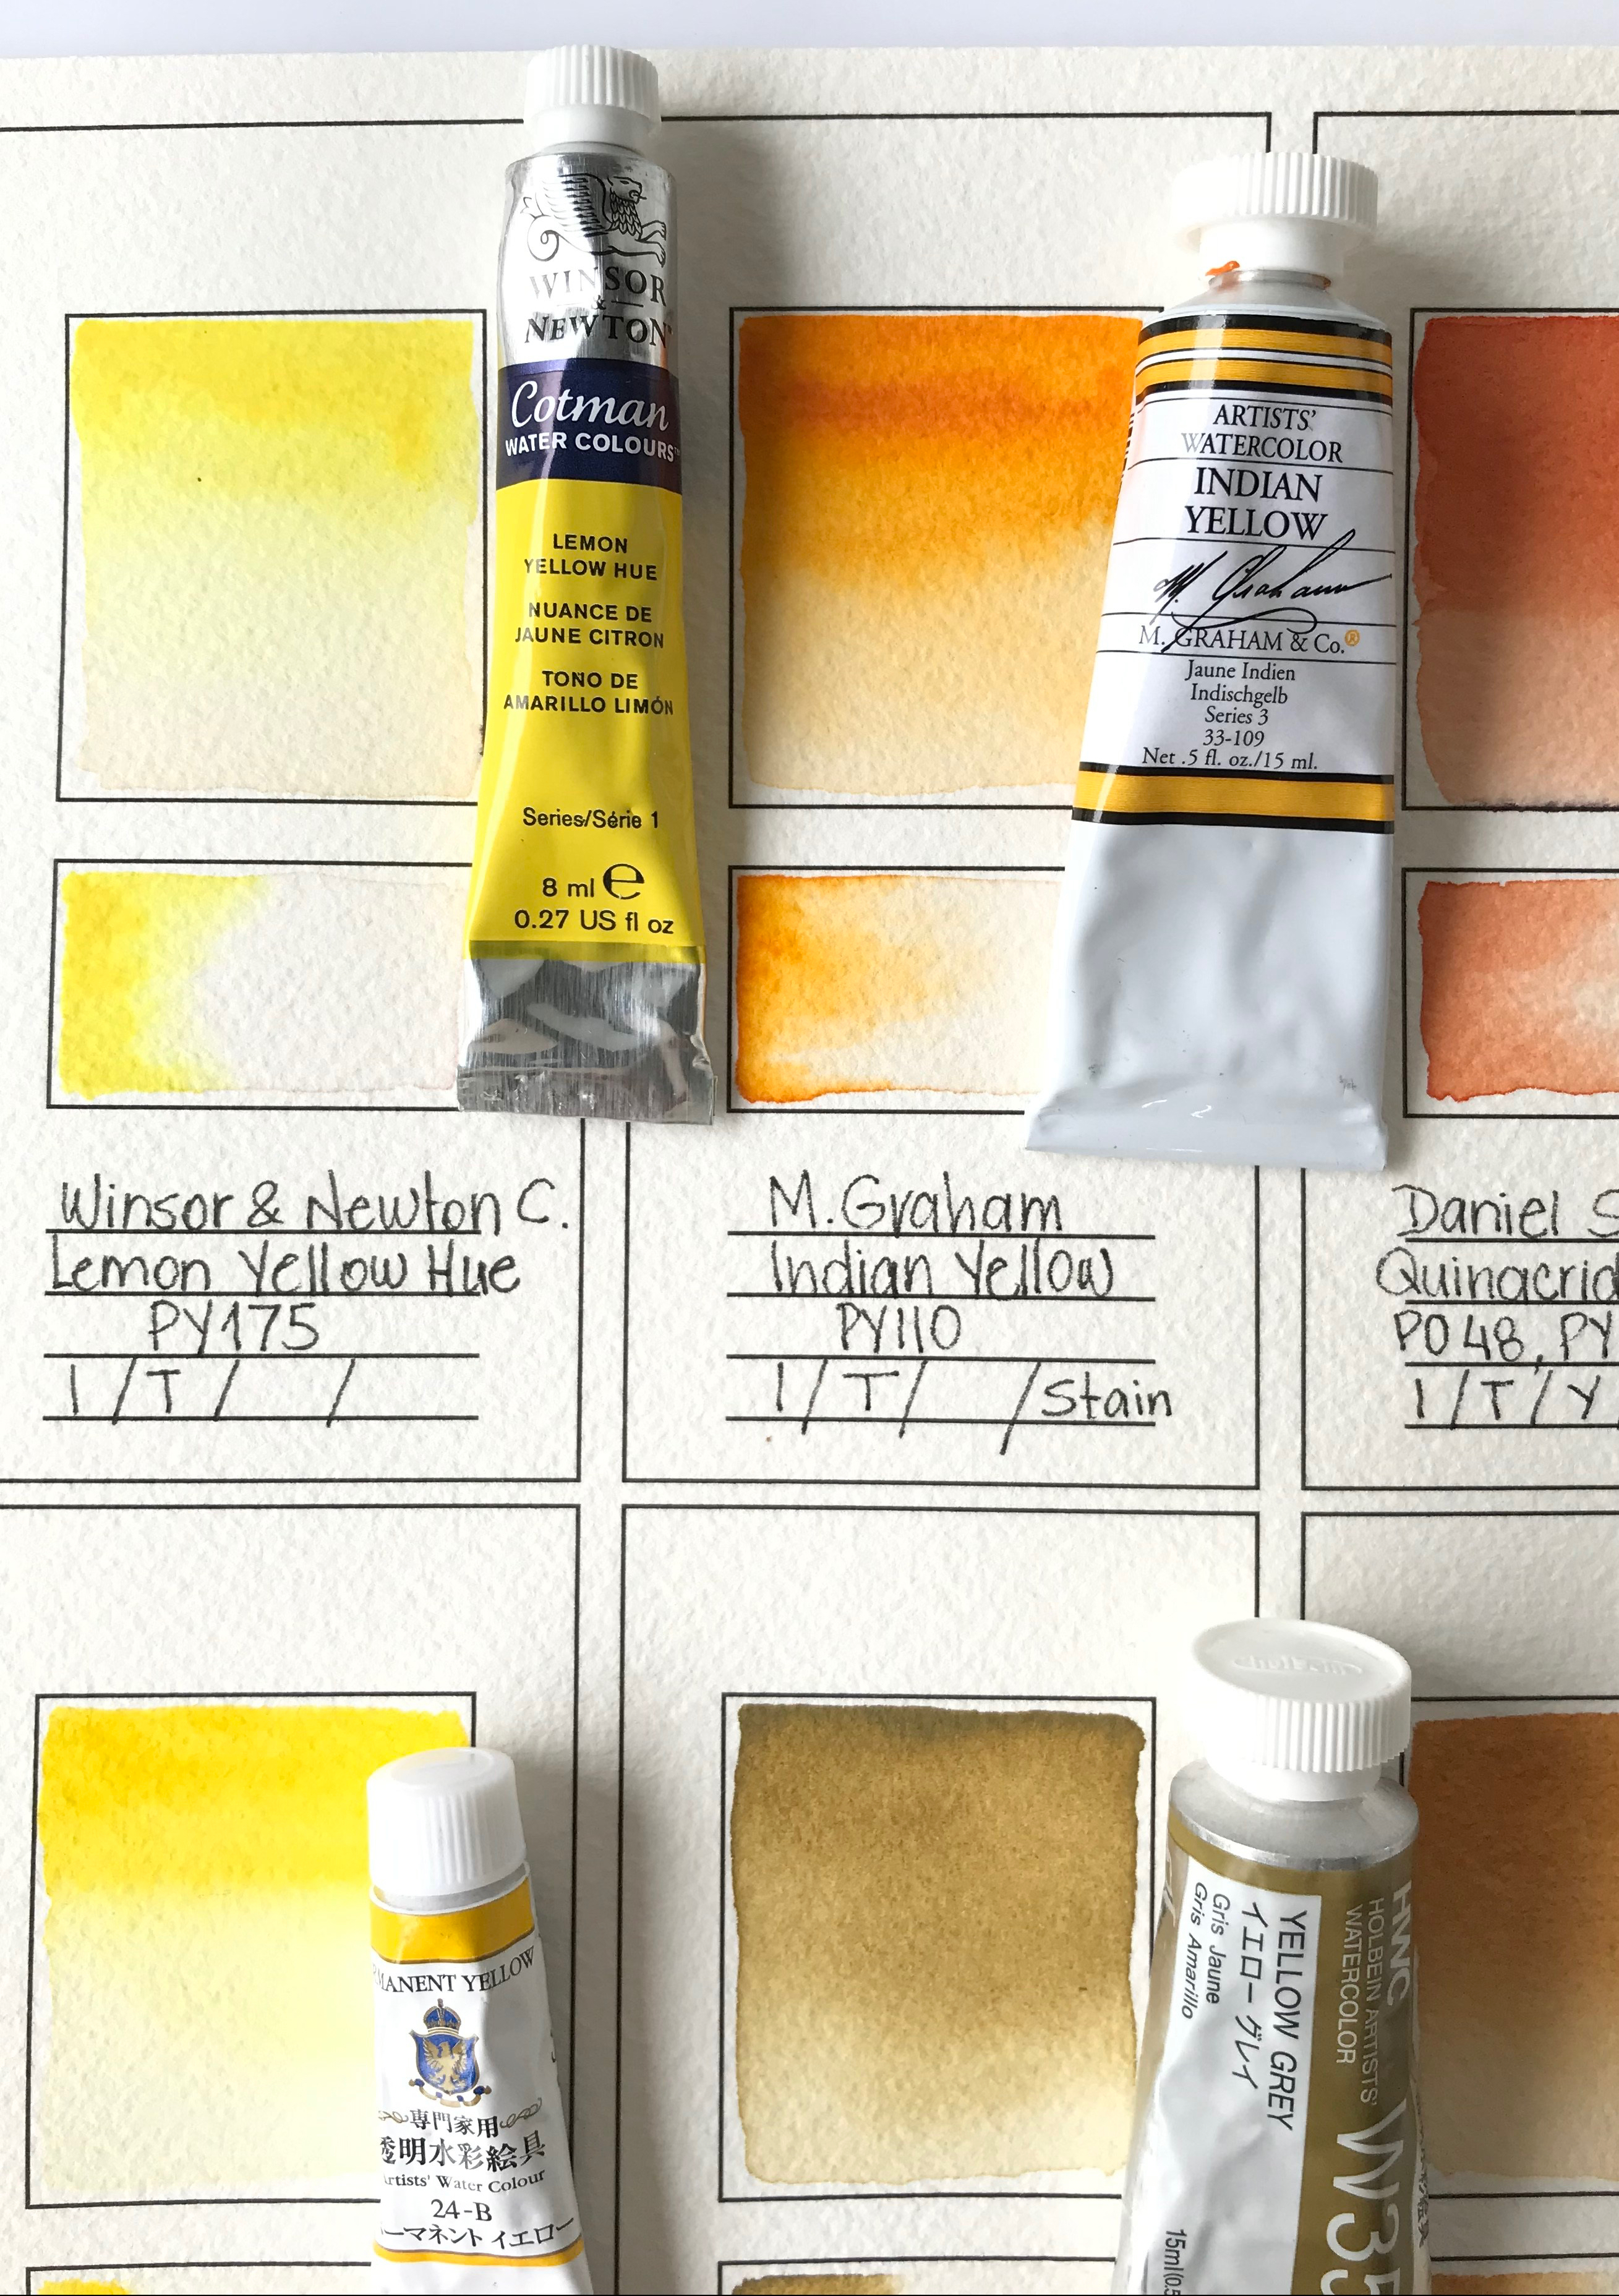
- The second step is to search online for the characteristics of each color on the brand’s website and write them down as part of the swatches chart. The most relevant information is brand, name color, pigment number, transparency, granulation, stain, and lightfastness. I know this is a lot of work but only needs to be done once, when you first buy the paint and saves you a lot of time down the road.
Brand: I don’t have a favorite brand yet; however, I tend to buy Daniel Smith watercolors. I also try to buy different brands and see their differences. So far, I have Daniel Smith, Winsor & Newton, Winsor & Newton Cotman, M. Graham, Sennelier, Holbein and a Japanese brand Artist’s watercolor.
This is the list of the color pigment codes for all brands (Code Index Name):
*P is for Pigment
PW (White)
PY (Yellow)
PO (Orange)
PR (Red)
PV (Violet)
PB (Blue)
PG (Green)
PBr (Brown)
PBk (Black)
Name Color: Even when all the brands have the same name color, they can be very different colors. Each manufacture uses different pigments and formulas to create their paints. For example, the pigments in the color SAP Green for these brands are:
Winsor & Newton: PG36, PY110
Daniel Smith: PO48, PY150, PG7
M Graham: PG7, PY110
Sennelier: PB29, PY153
Sennelier is a brand that uses a honey as an additive to give brilliance and smoothness to the paint. Also, honey gives longevity, radiance and luminosity to the paint. Having different pigments, binders and additives create completely different colors. If you like a specific color, stick to the same brand to avoid surprises.
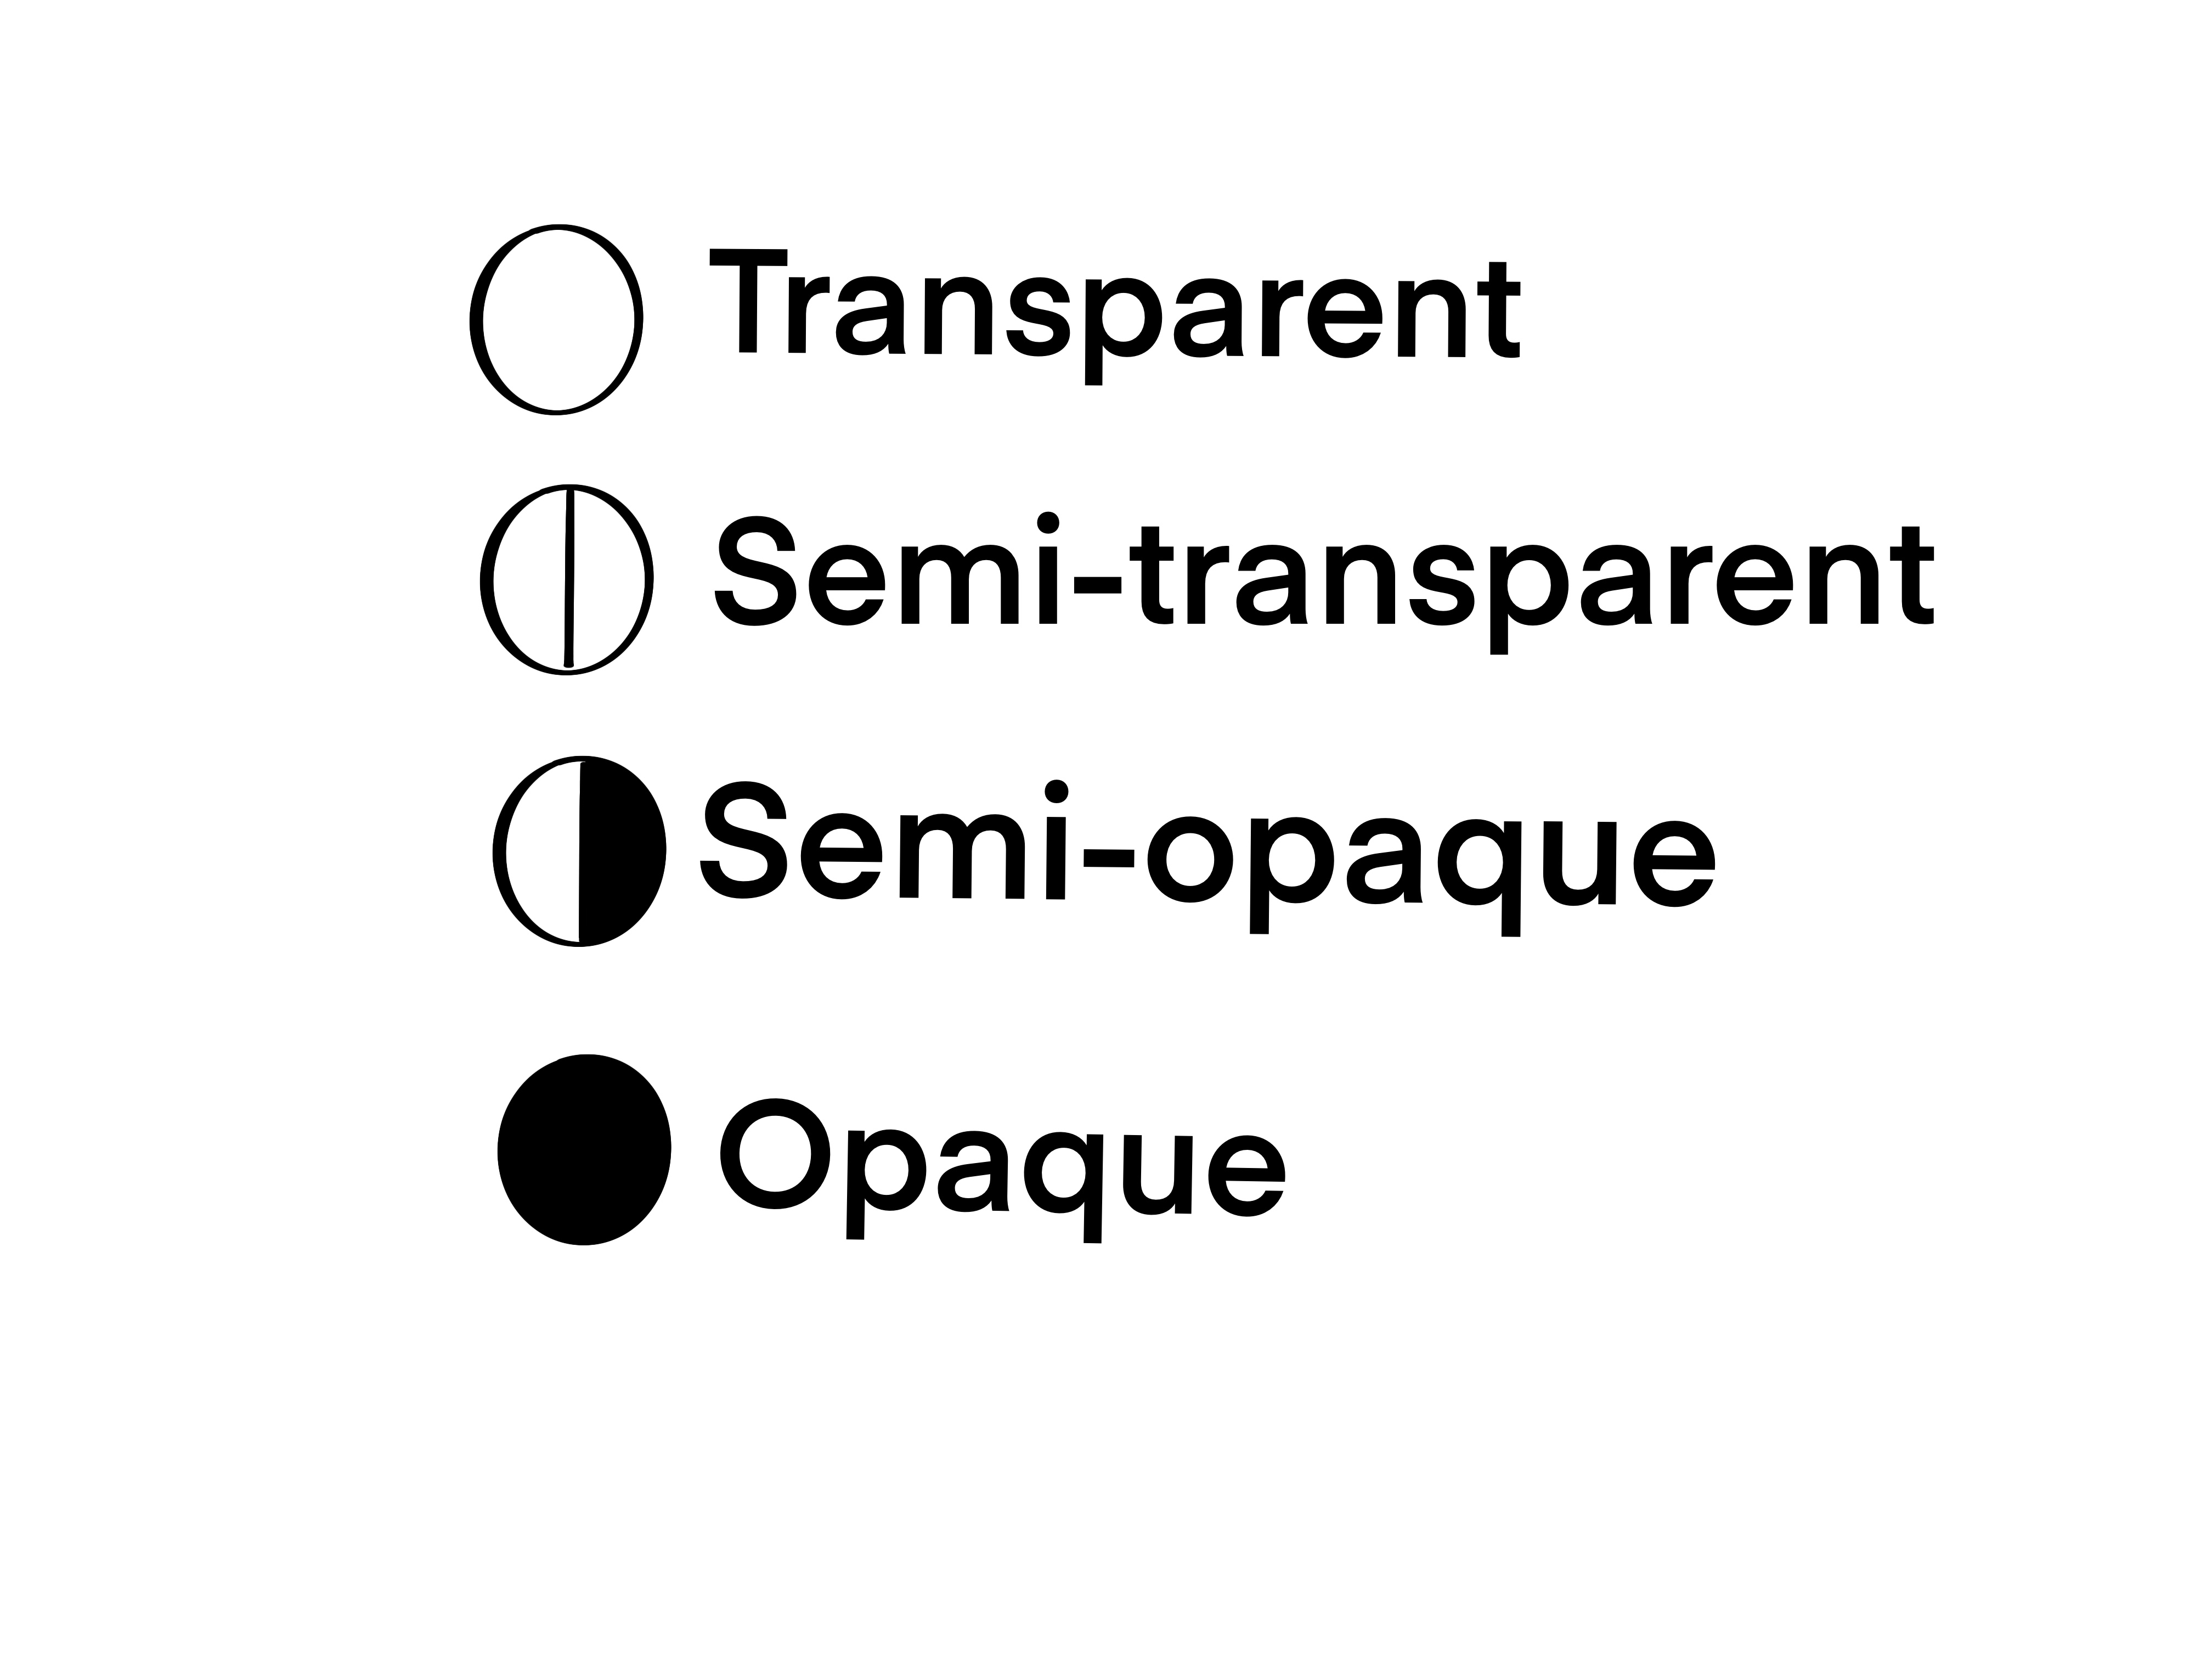
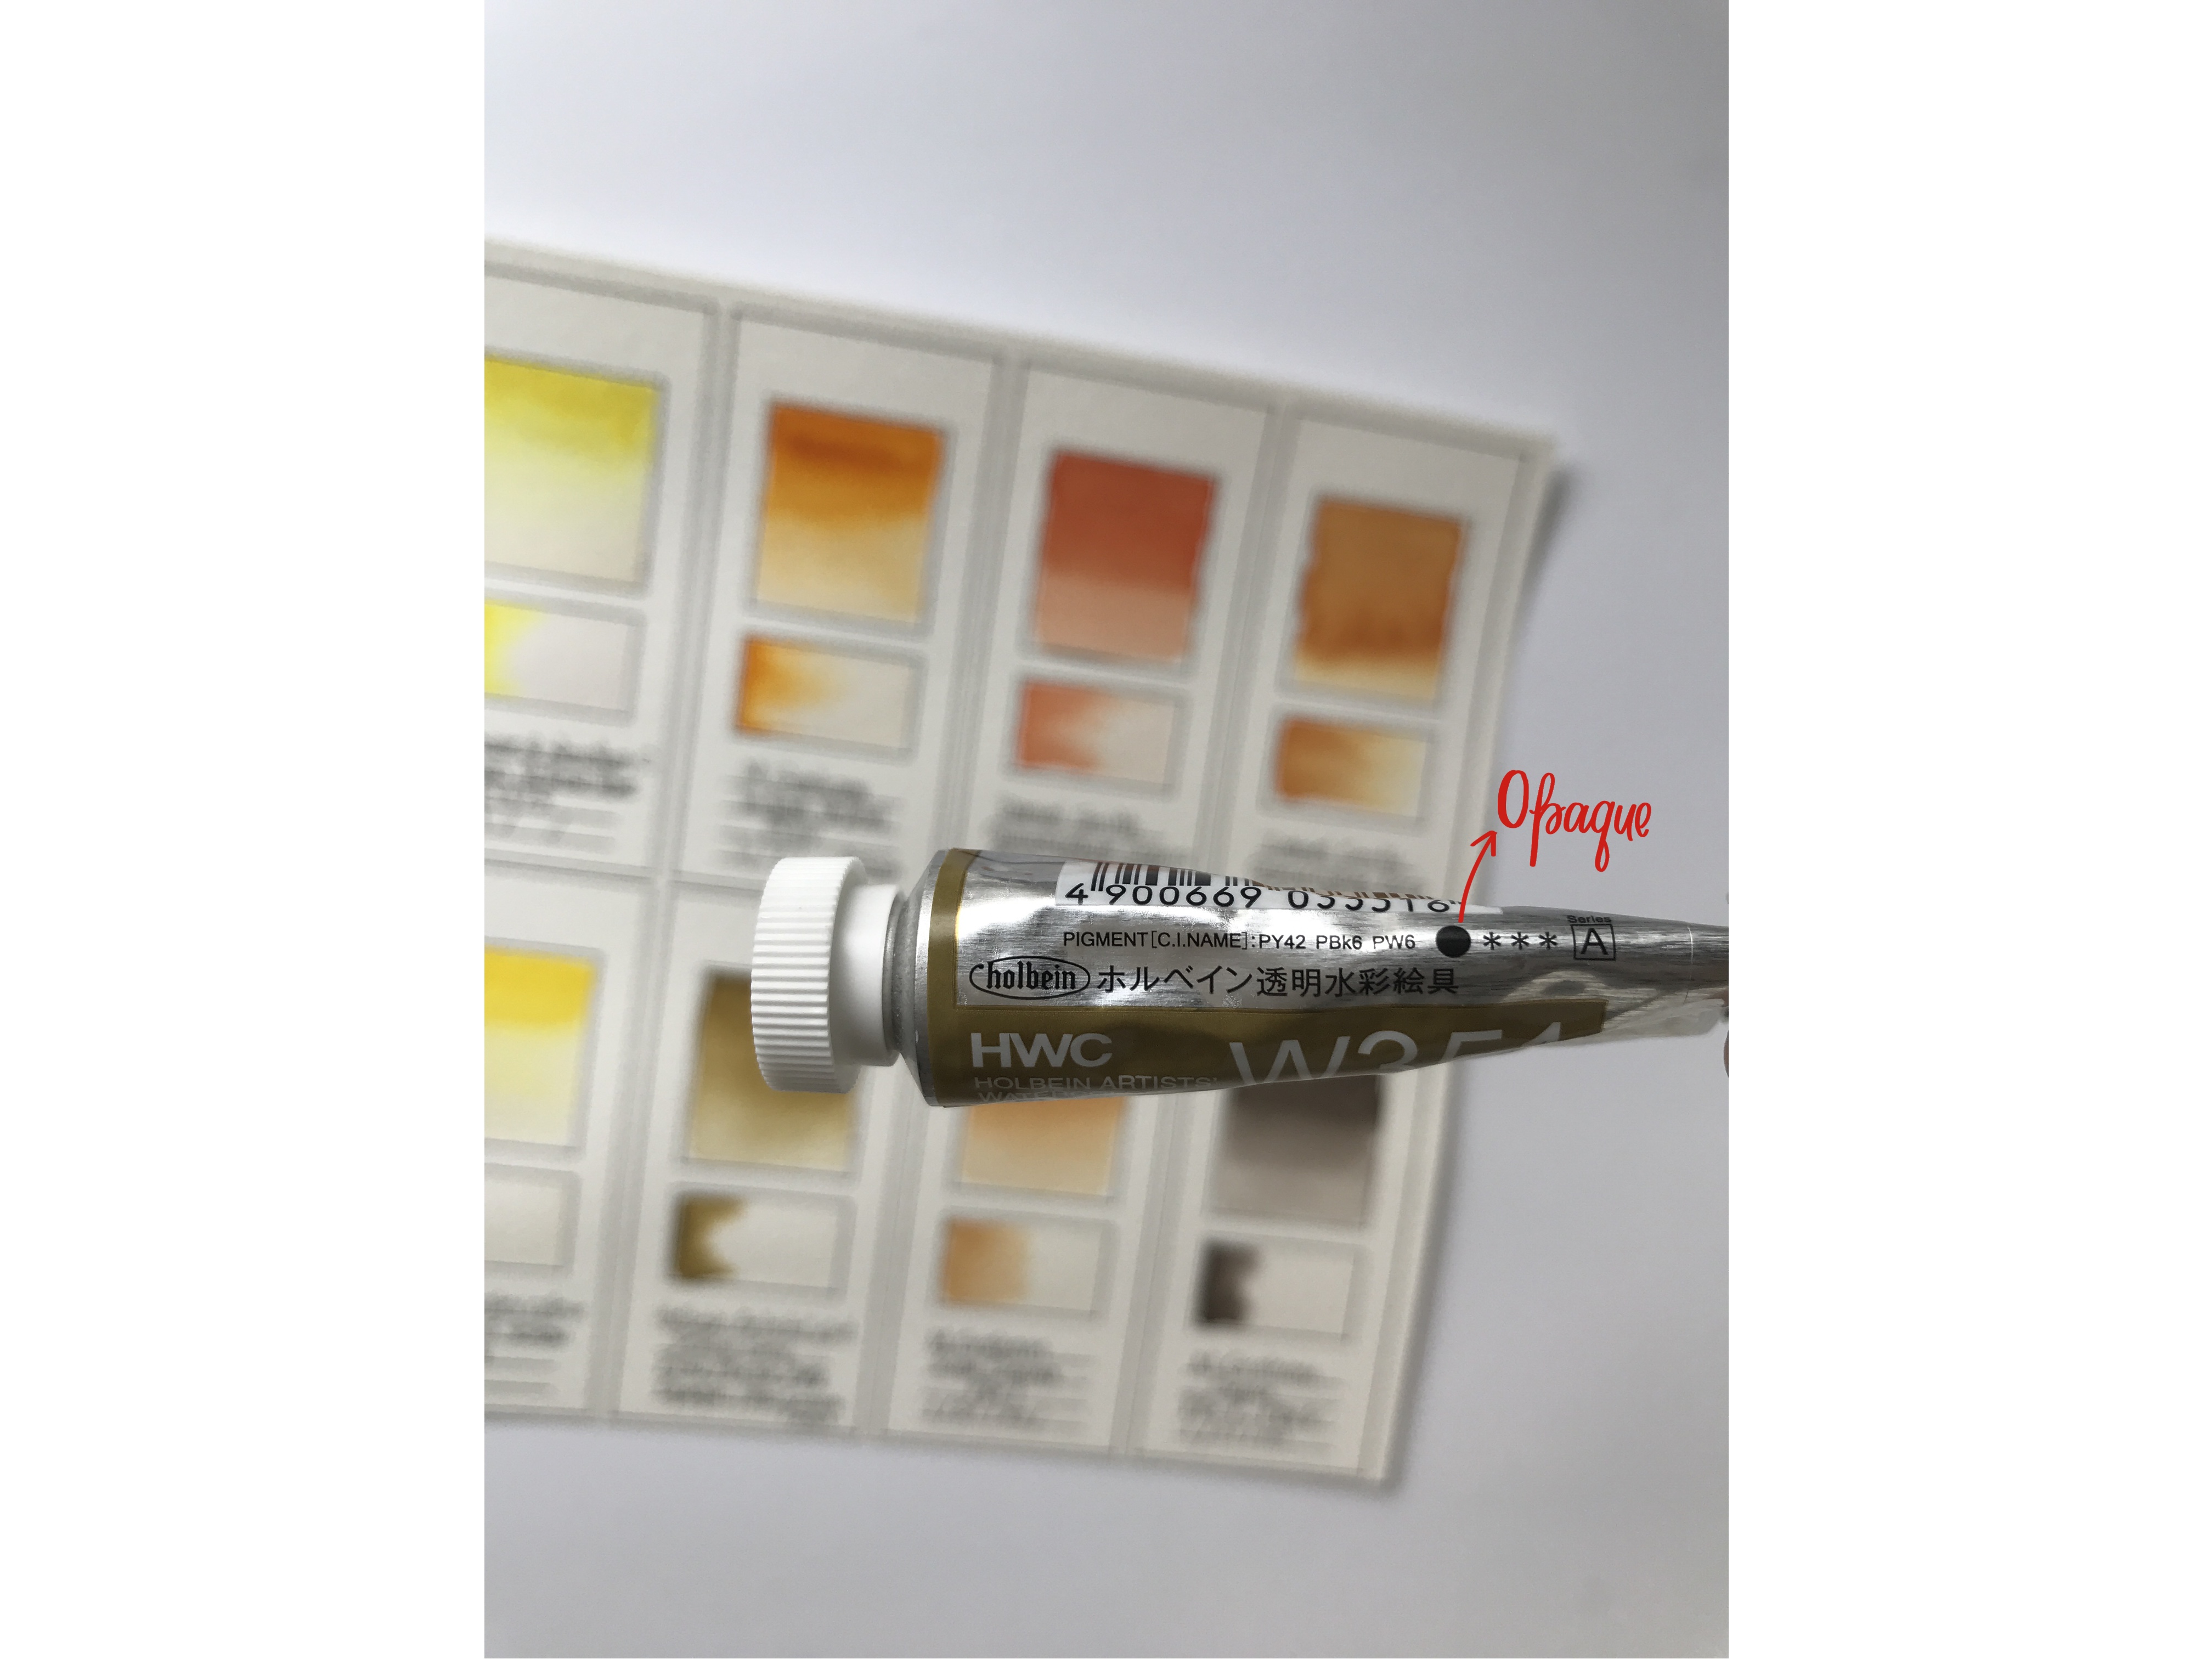
Transparency: When you know the different levels of transparency in your colors, then you will know how to mix them with other colors and how it will look when applying glazing or layering. This is how transparency is divided starting with the most transparent: Transparent, semi-transparent, semi-opaque, and opaque. It is recommended to use transparent paint in order to achieve the best result from a watercolor and allow for nice layering for more depth in your paintings.
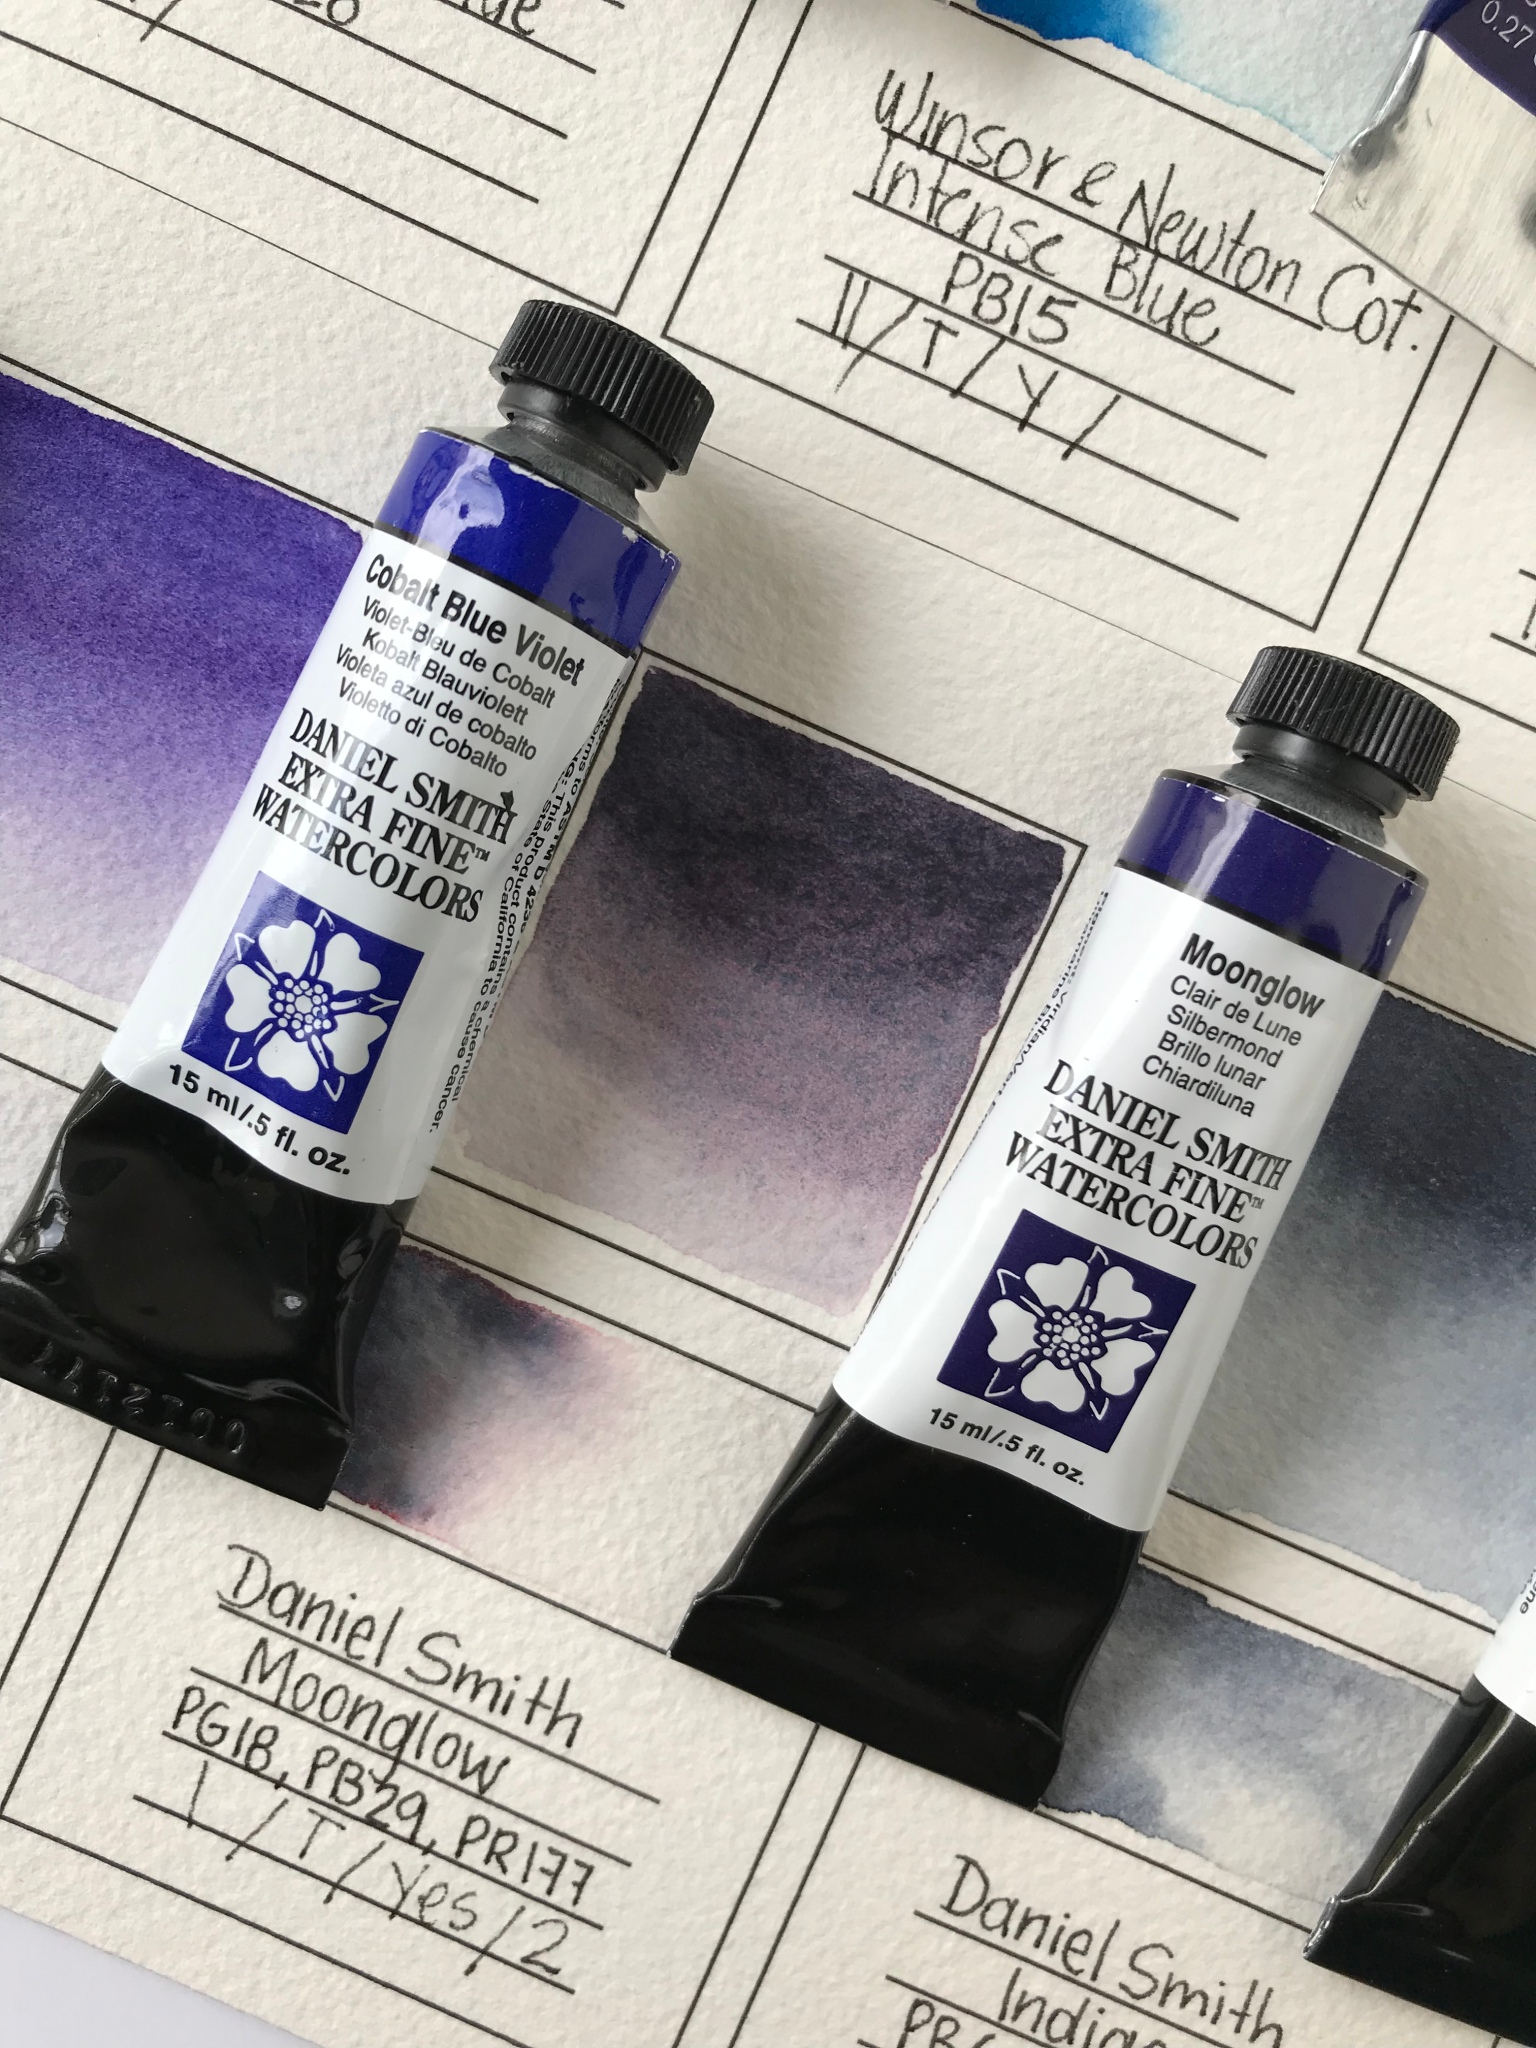
Granulation: This term describes the consistency of the color pigment when it sets. The more consistent the color is the less the granulation. The amount of granulation in a paint depends on each brand’s formula. The more amount of pigment, the more granulation effect on the painting. The result is a variety of washes and texture in the painting. Some artist like this texture effect on their paintings and some prefer smooth paints. I personally love this effect on my paintings, it gives a lot of color personality to my art. My favorite colors with granulation effects are Cobalt Blue Violet and Moonglow, which I use a lot to create shadows.
Stain: This characteristic allows you to see the effect of permanency and correction in a color once the paper is dry. This test is done on the most saturate part of the color wash once it is completely dry, with a wet brush we make a few strokes over to clean up the paint from the paper (avoid going back and forth, strokes in one direction). Paints are divided by low, moderate, and high staining. This technique is not shown in my swatches here.
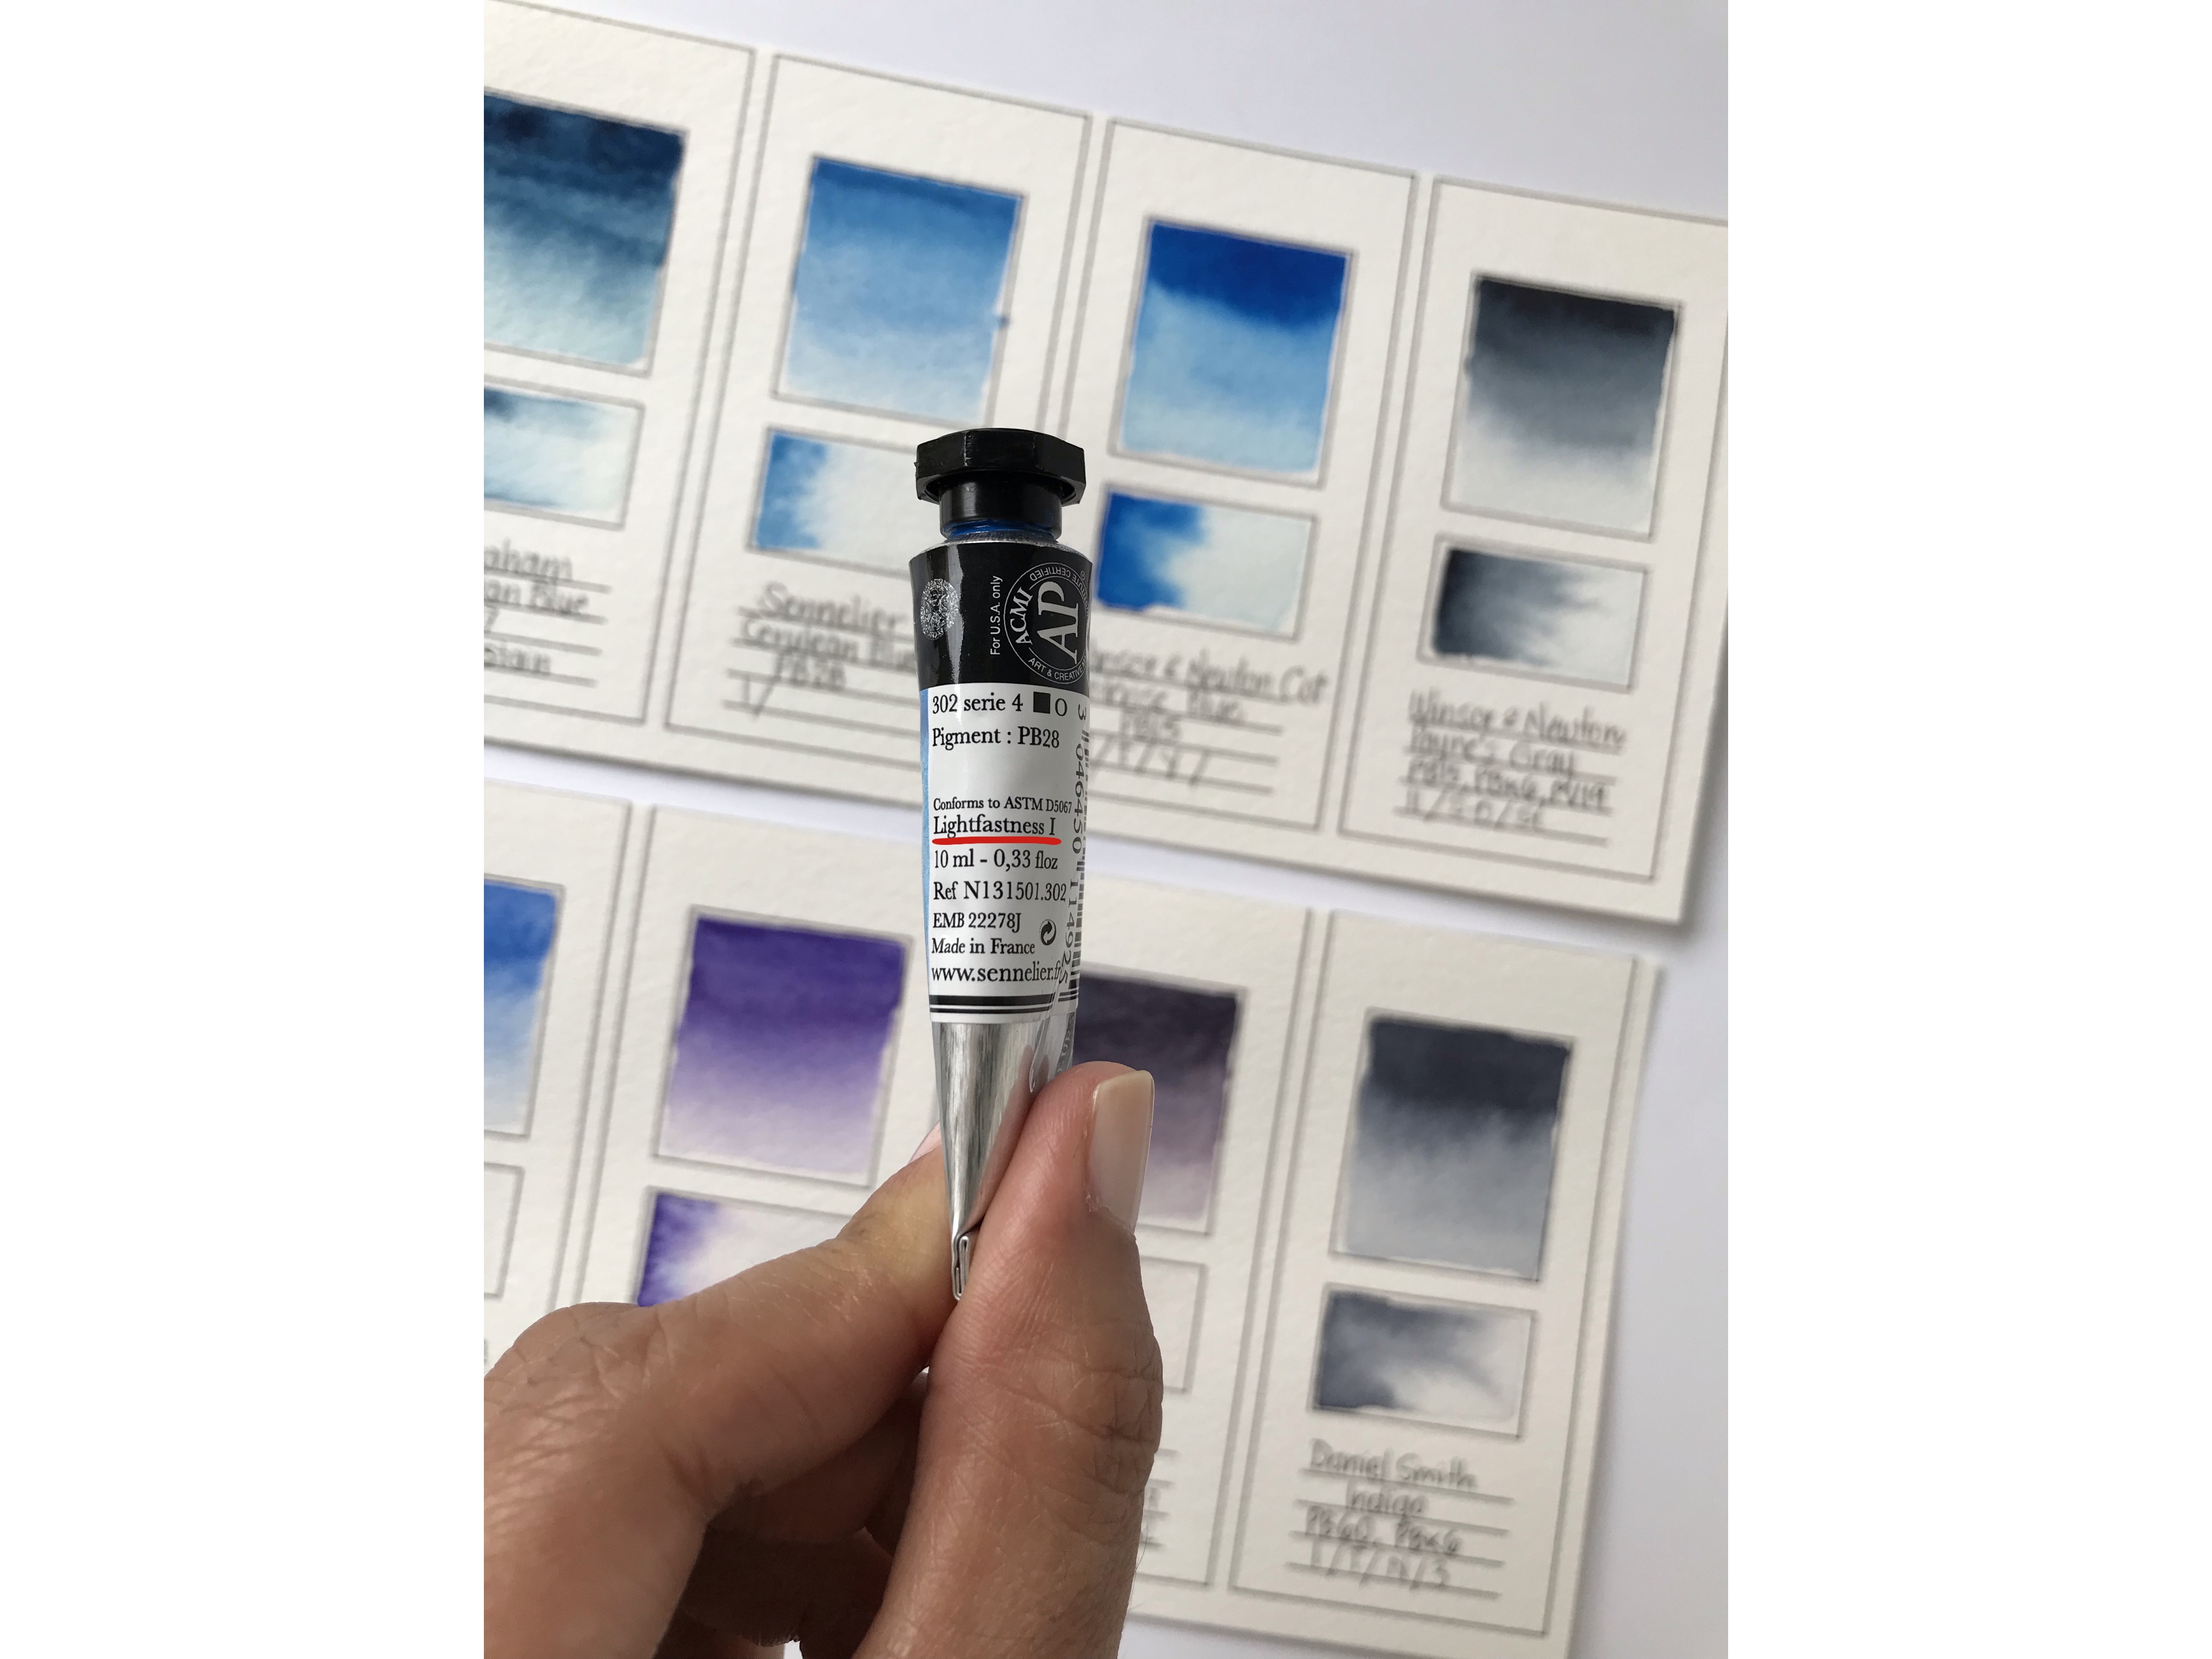
Lightfastness or permanence: This property is very important, especially if you want to sell your paintings; it indicates the permanency of the color on the paper once the painting is exposed to direct sun light or in high humidity area. You don’t want your painting to fade away after so much effort and time put on the painting. The American Society for Testing and Materials (ASTM) has the following standards rating lightfastness:
I. Excellent lightfastness (100 + years)
II. Very good lightfastness (100 years)
III. Fair (50-70 years)
IV. Fugitive (15-20 years)
(NR) Not rated
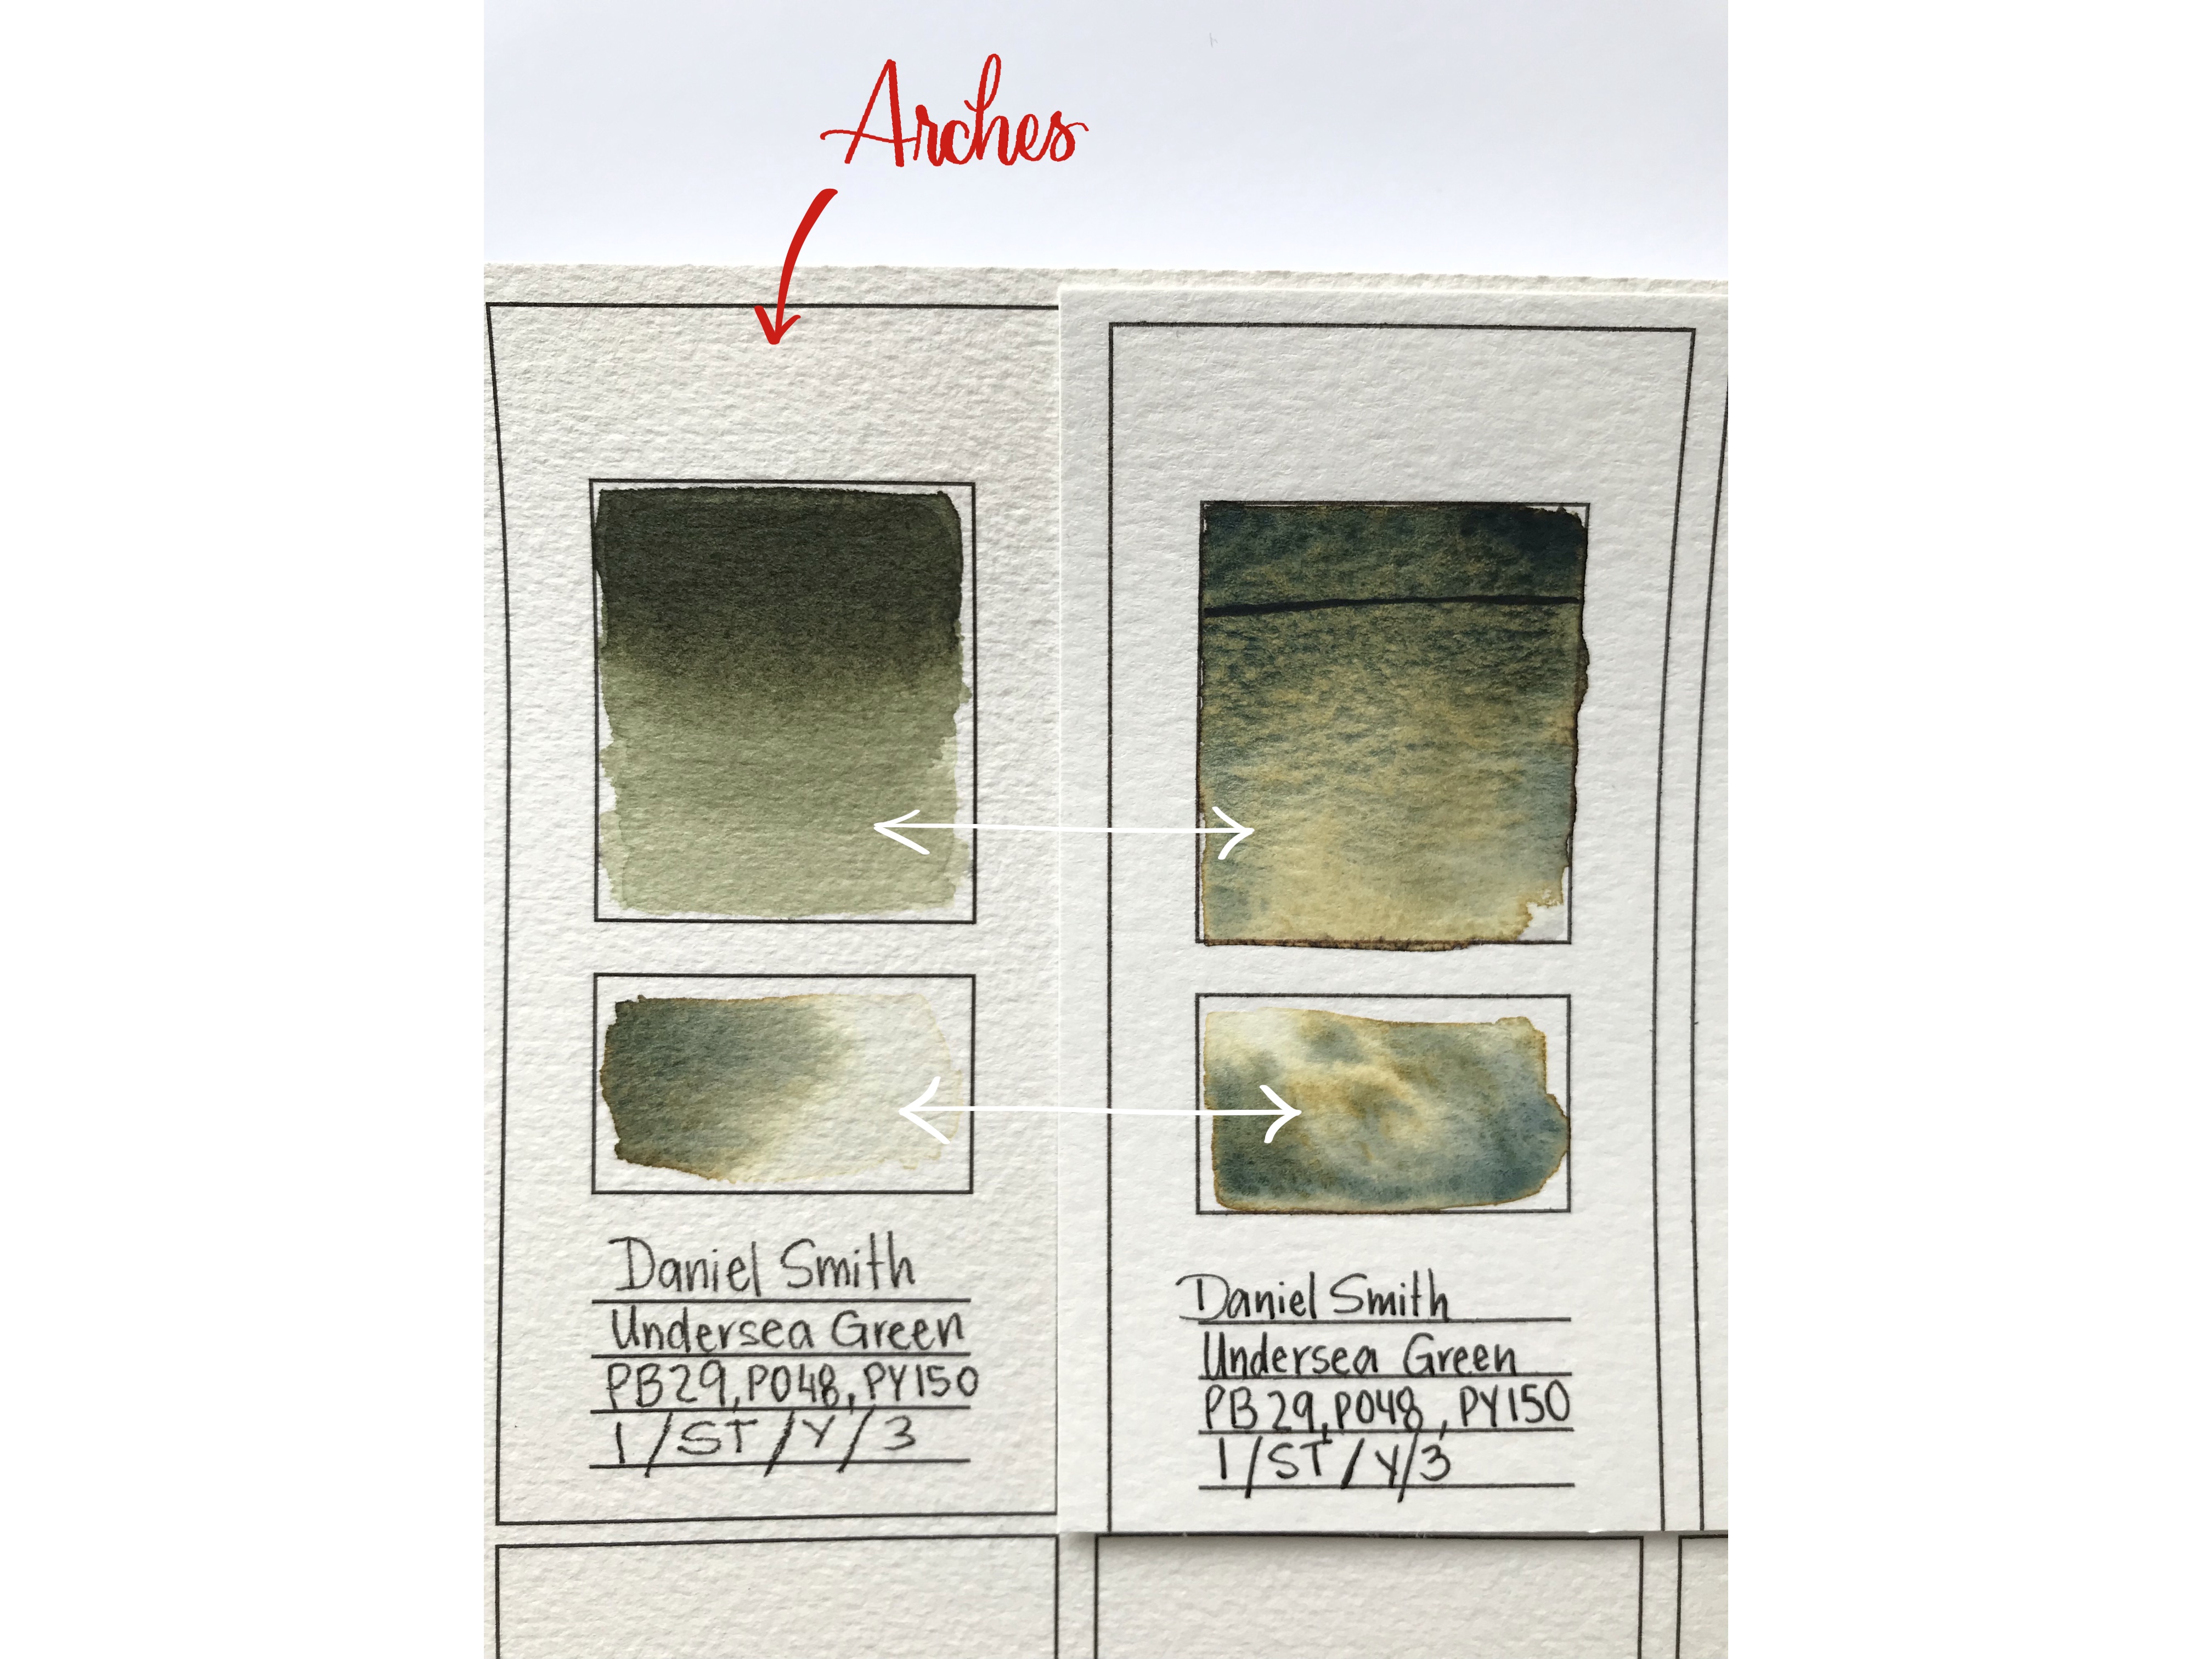
3. Choose the same watercolor paper to do your swatches that you are going to be using for all of your paintings. That way you can trust the reference when going back to your swatches. There is a huge difference between the various types of paper which is strongly correlated with price. I highly recommend Arches Cold Press 140lb/300g. The results of our swatches are very different according to the type of paper. Here is an example of watercolor swatches using the same color, Undersea Green from Daniel Smith, in two types of watercolor paper:
4. Watercolor brush: For this type of activity I used a round watercolor brush size 2 and 6. I have seen other artist use a flat brush to do their watercolor swatches which I think is better since it will leave a clean wash after every stroke. I always use round brushes to paint so I feel more comfortable using this type of brush.
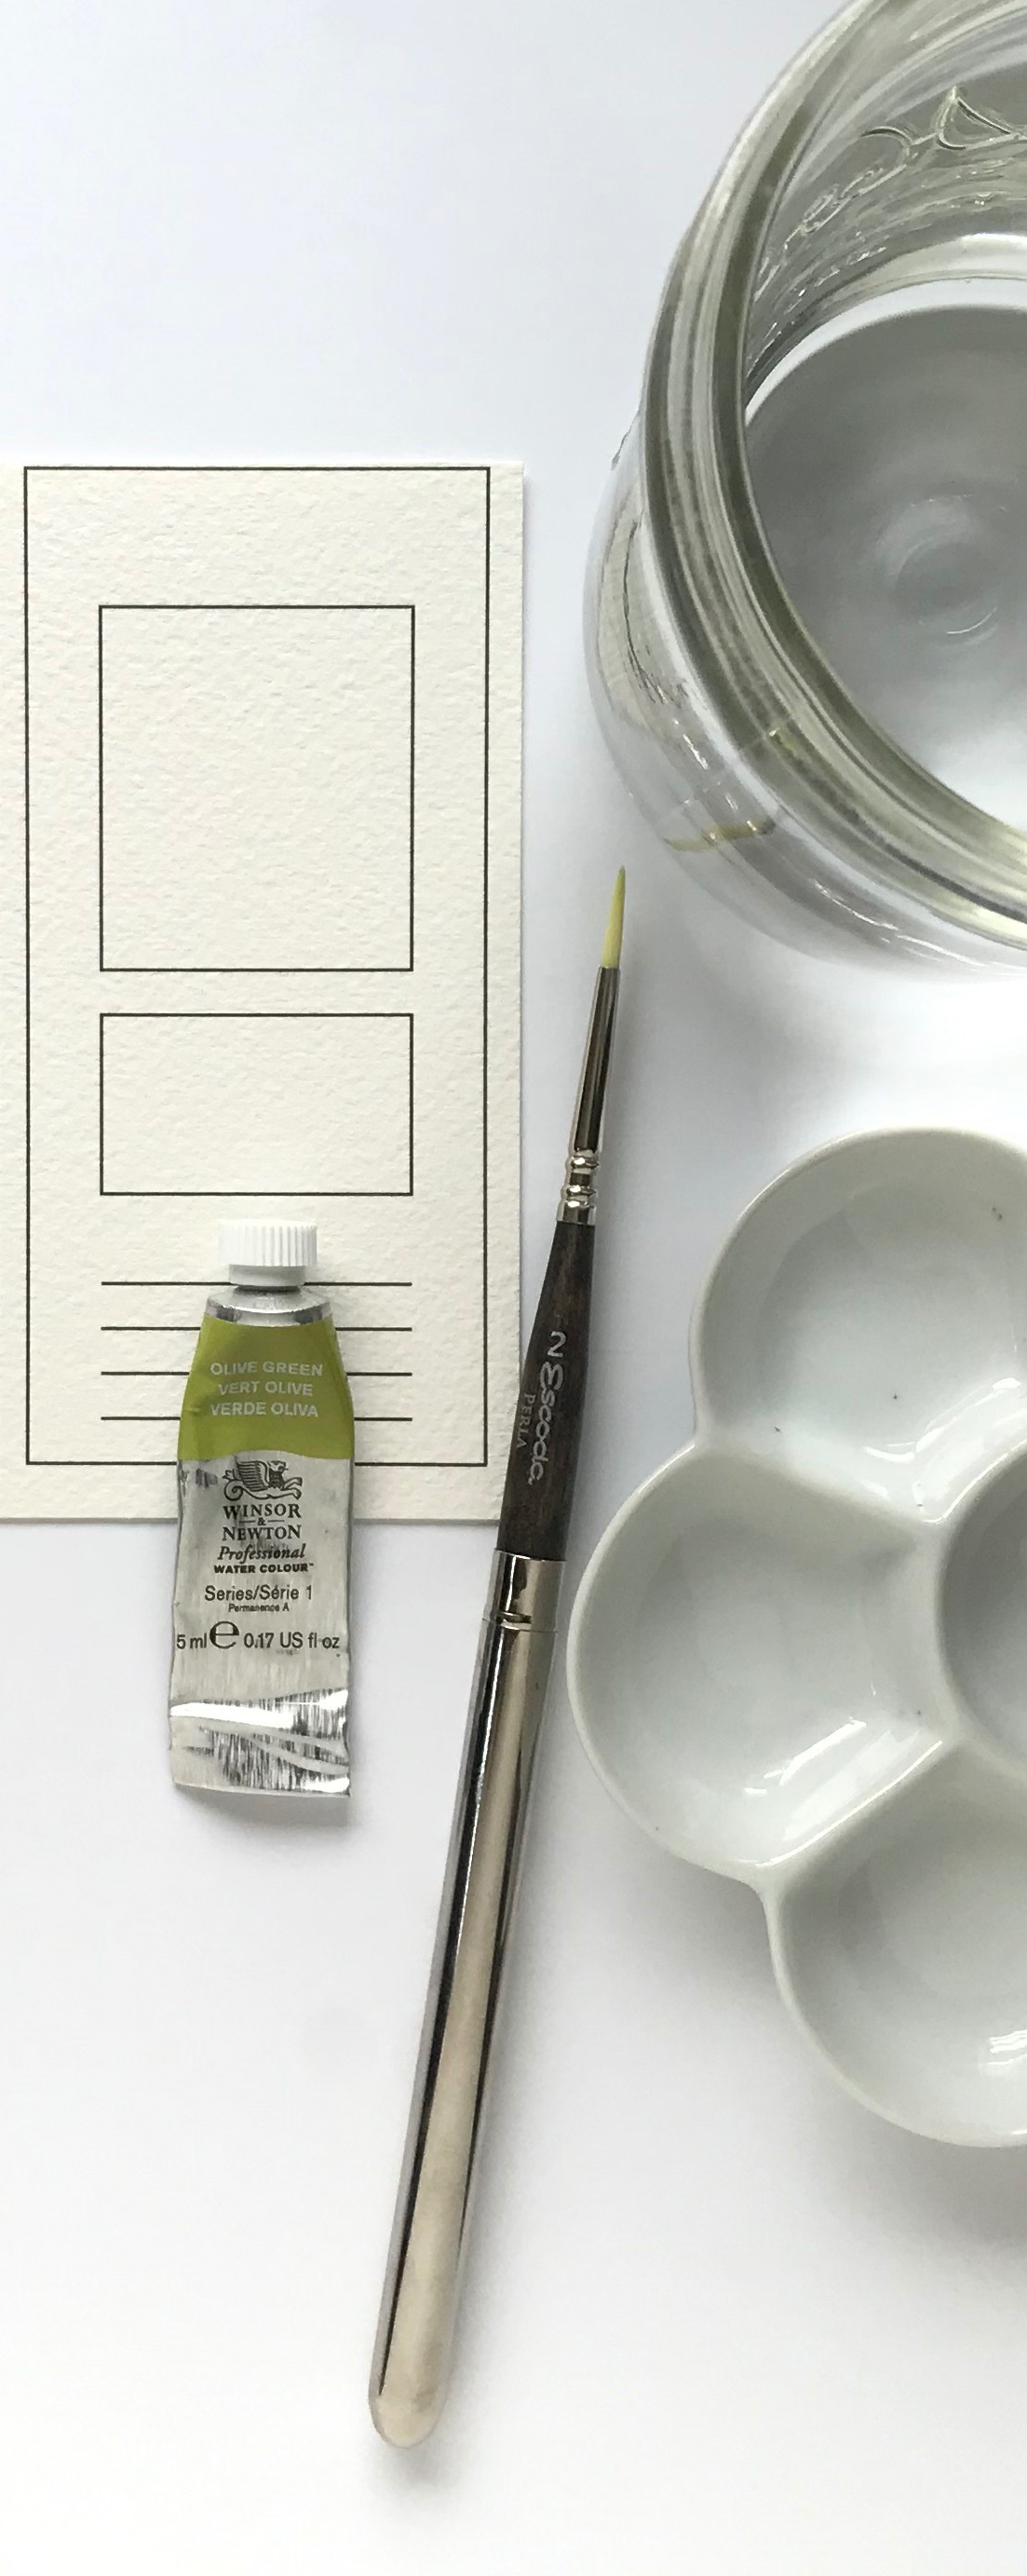
5. Using the help of a palette or a ceramic plate, add a little bit of color to it with a few drops of water. Mix them very well and start applying paint from the top to the bottom of the main rectangle. I apply one stroke fully saturated with color at the beginning, then I clean my brush with a towel or paper towel, proceed to wash the tip of my brush with clean water and apply another stroke underneath the last stroke and repeat until the color is completely transparent. If you live in a very dry area, try to do the swatch as fast as you can to avoid watermarks between strokes.
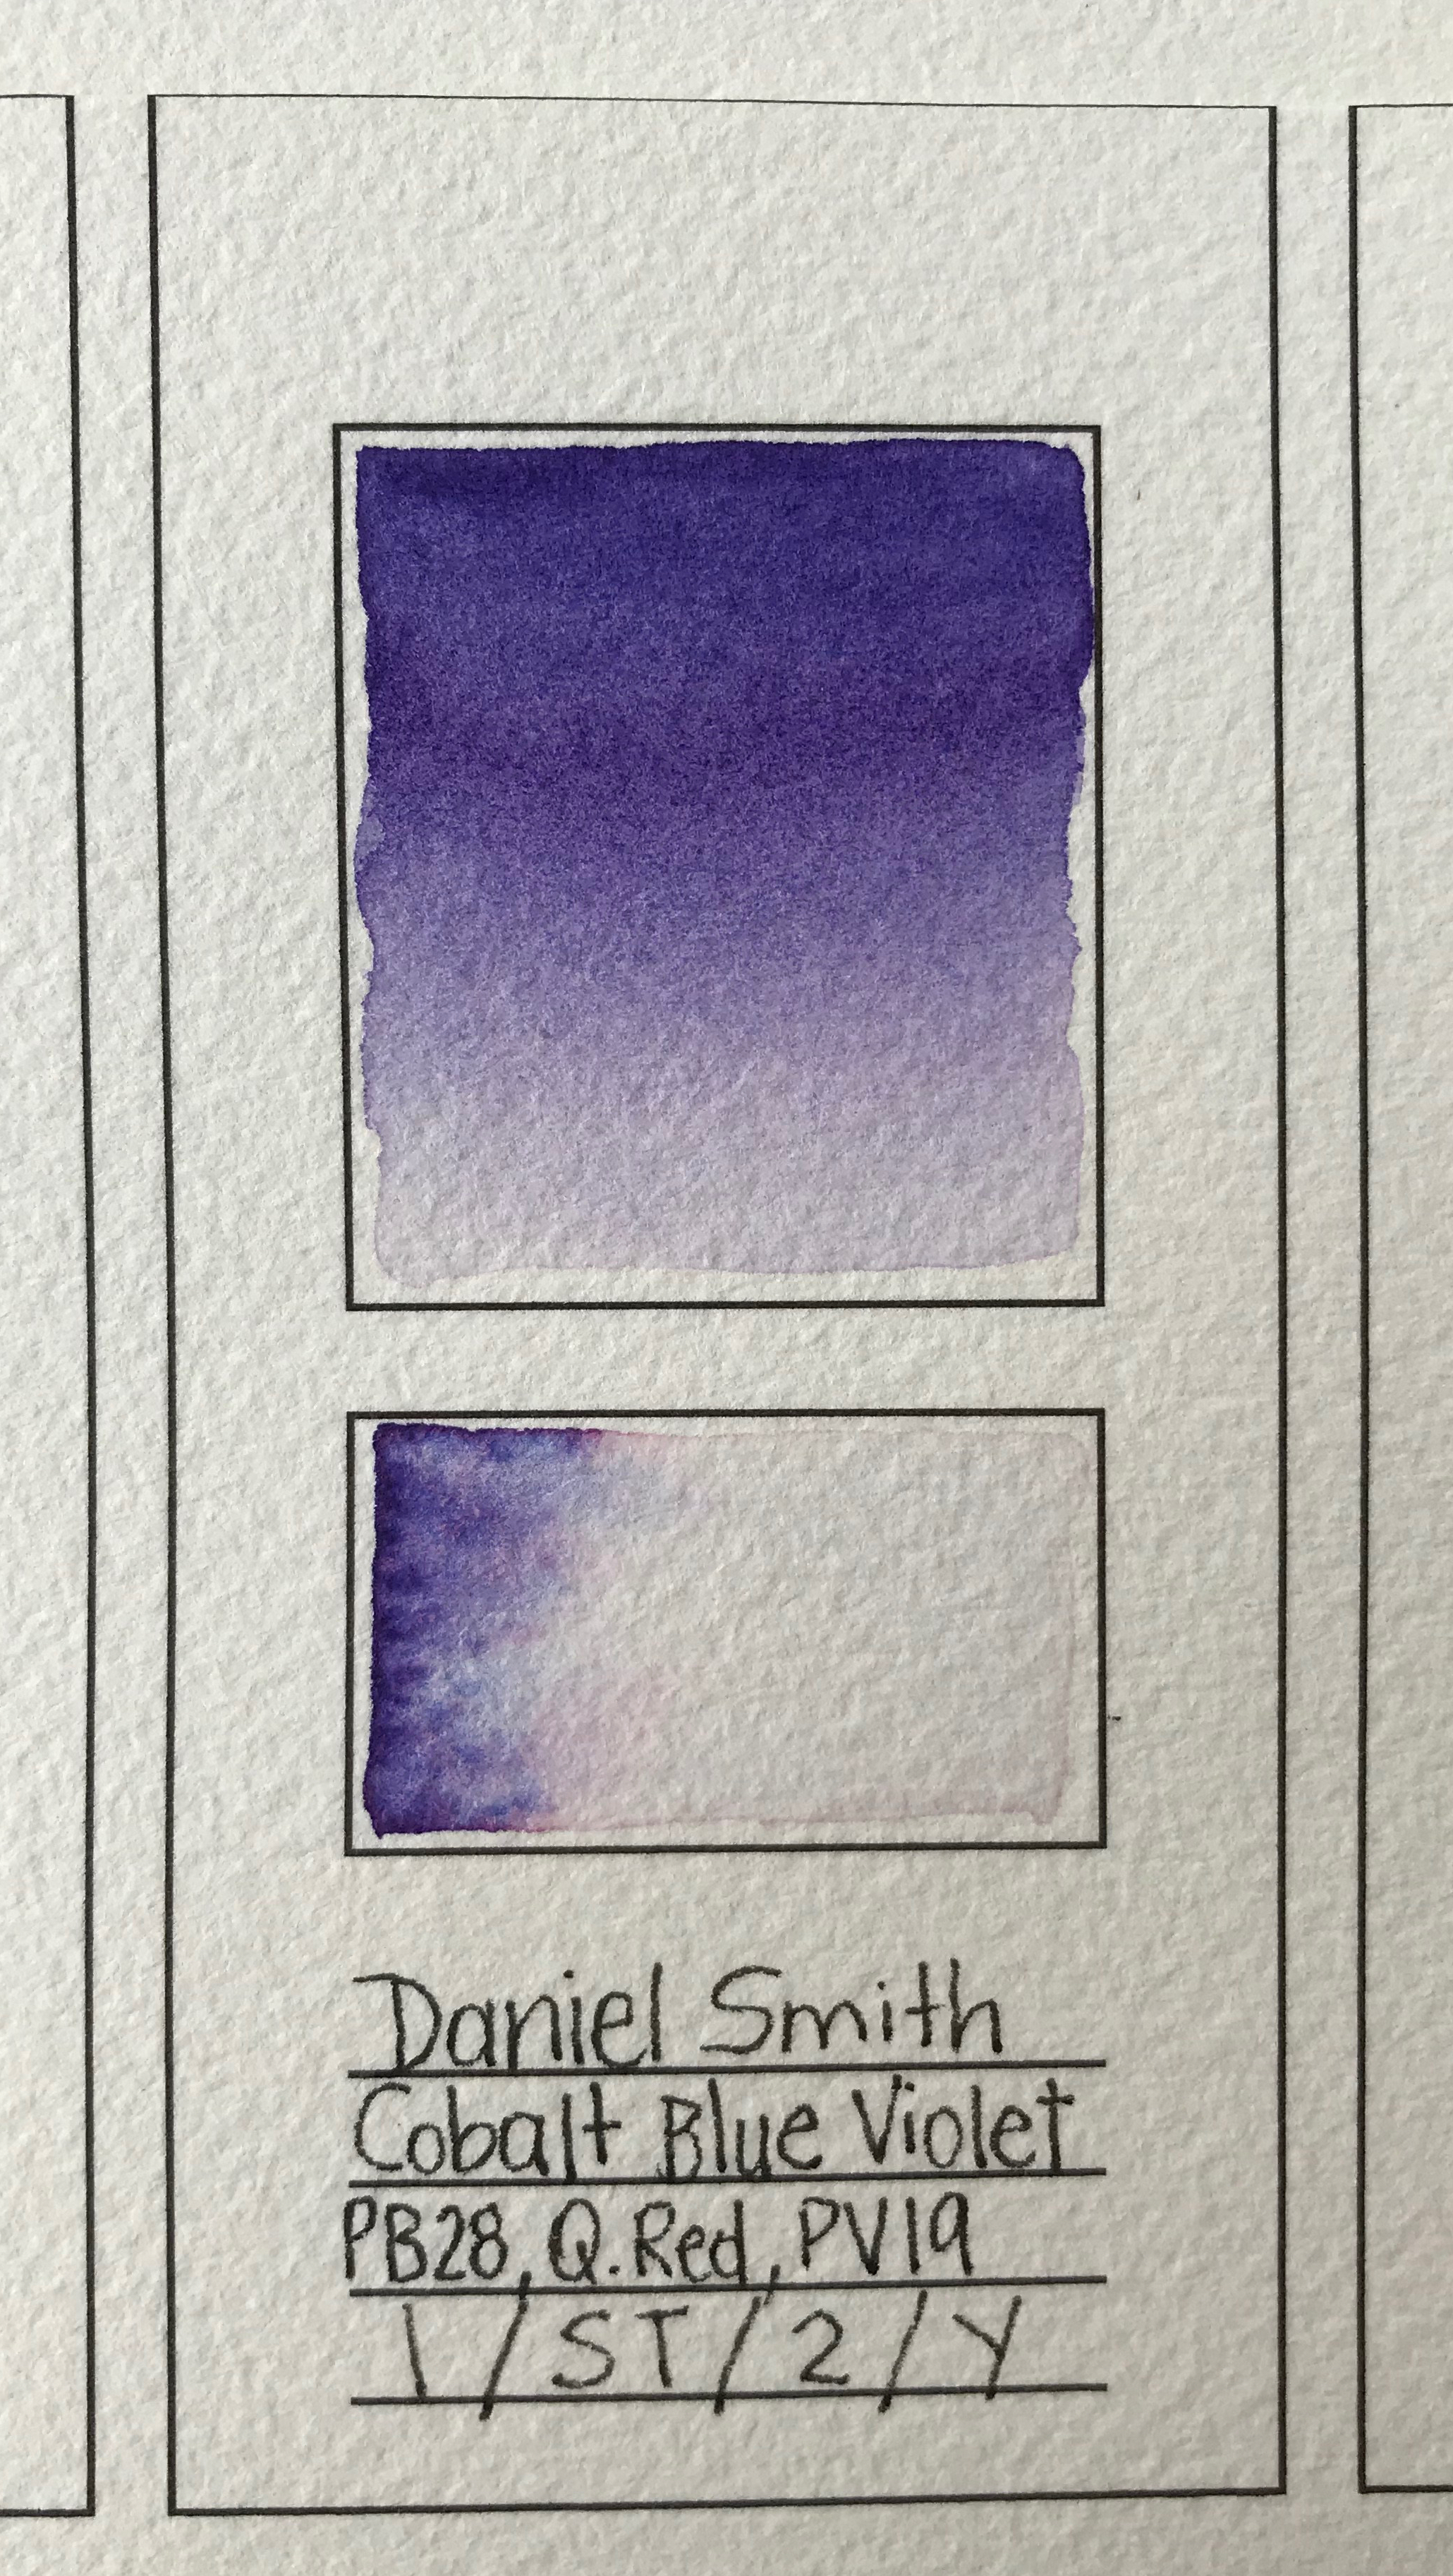
6. Wet on wet technique: we are going to apply clean water to the rectangle above the color’s information and after saturating our brush with some color we are going to only touch the left wet are of our rectangle and see how the paint travels in water. This is how our paint is going to react when painting. This wet on wet area is going to look a little bit different by the time when it dries.
If you know the different watercolor techniques, and have practiced almost daily, and still feel like you haven’t achieved your painting goals, I highly recommend blaming your art supplies before you quit watercolor painting. For best results when buying watercolors, choose artist grade paints with few pigments, high transparency, and excellent lightfastness. Also, invest in good watercolor paper and a set of good watercolor brushes. Lastly, keep practicing! Create muscle memory by painting often and after a while I promise you will master watercolor techniques that will reflect in your work.
I have a YouTube video where I show you how I created my watercolor swatches:
That’s it! You have all of your swatches done and organized. Now start having fun painting.